
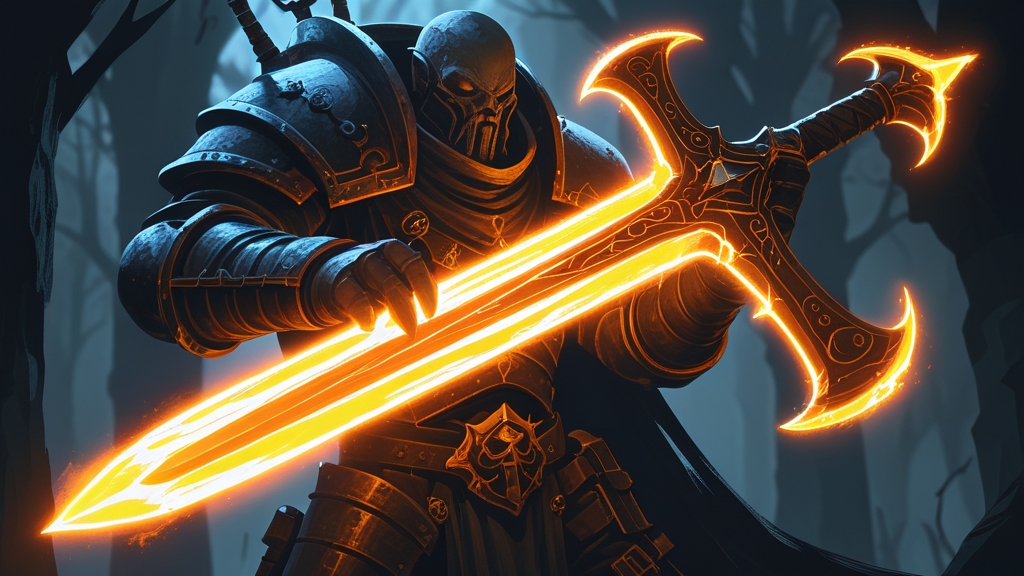
Create glow effects with just a brush using thin glazes of bright colour built up in layers. Start with white at the source, then glaze outward with your chosen colour (blue, green, orange), each layer covering less area. Thin your paints heavily — each glaze should be nearly transparent, and the glow effect builds up through multiple overlapping layers rather than a single application. This technique, called Object Source Lighting (OSL), is one of the most impressive effects in miniature painting, and you absolutely do not need an airbrush to achieve it.
The airbrush-free glow is one of those techniques that separates good painters from great ones — not because it’s extraordinarily difficult, but because it requires patience, understanding of light theory, and the discipline to build up effects gradually. Every layer you apply is barely visible on its own. The magic happens when ten or fifteen barely-there glazes accumulate into a convincing glow that looks like the miniature is actually emitting light.
What Is OSL (Object Source Lighting)?
Object Source Lighting is the technique of painting a miniature as though a light source on the model itself is illuminating the surrounding surfaces. A glowing sword should cast light on the hand holding it, the face of the warrior, and any nearby armour plates. A plasma gun’s coils should illuminate the Marine’s arm and chest. A burning torch should warm the colours of everything within its range.
OSL is fundamentally about understanding how light works. Real light sources are brightest at the centre (white or near-white), transition through their colour (blue, green, orange) as distance increases, and fade to nothing at their maximum range. Light only reaches surfaces that face the source — it doesn’t wrap around corners. Light intensity falls off with the square of the distance, meaning surfaces twice as far away receive only a quarter of the light.
These physics principles translate directly into painting technique. The light source itself is the brightest point on the model. Nearby surfaces that face the source receive strong colour. More distant surfaces receive weaker colour. Surfaces that face away from the source receive no glow at all. Getting these relationships right is what makes OSL convincing — the eye instinctively recognises correct lighting, even if the viewer can’t articulate why it looks right.
What Paints Do You Need?
Effective glow effects require surprisingly few paints. For any single glow colour, you need three things: white, your glow colour, and a glaze medium or simply water.
White (White Scar, Vallejo White, or any opaque white) forms the core of the light source. This is the brightest point of the glow — the centre of the plasma coil, the heart of the sword’s energy, the hottest part of the flame. Pure white represents maximum intensity.
Your glow colour should be a bright, saturated version of the colour you want. For blue glow, use a bright blue like Baharroth Blue or Vallejo Light Blue. For green, use Moot Green or Scorpion Green. For orange/fire, use Flash Gitz Yellow transitioning to Troll Slayer Orange. Use the brightest version of the colour available — you can always tone it down, but you can’t make a dull colour glow.
Lahmian Medium (or Vallejo Glaze Medium, or simply water) is essential for creating the thin glazes that build up the glow. Medium is preferable to water alone because it maintains paint consistency without breaking surface tension. However, heavily thinned paint with water works perfectly well — it’s just slightly less predictable.
You may also want a mid-tone version of your glow colour for transitional areas. For blue glow, this might be Caledor Sky or Teclis Blue — a darker version of the glow colour that bridges between the bright glow and the model’s regular colours.
Step-by-Step: Painting a Glowing Sword
The glowing power sword is the classic OSL exercise. Master this, and you can apply the same principles to any light source on any model.
Step 1: Paint the sword white. The blade itself should be pure white, as it is the light source. Apply two or three thin coats of white paint until the blade is evenly covered with an opaque, bright white surface. This white base is critical — it provides the maximum brightness that the glow colour will be applied over.
Step 2: Glaze the blade with your glow colour. Mix your glow colour with medium or water until it’s very thin — you should be able to see through it on your palette. Apply this glaze over the blade, leaving the very centre and edges slightly lighter. This transforms the white blade into a bright, luminous version of your glow colour. Two or three glazes build up a vibrant colour while maintaining the underlying brightness.
Step 3: Intensify the blade’s edges and centre. Add a tiny amount of white to your glow colour and apply this brighter mix to the blade’s edges and centre ridge. This creates the appearance of light being most intense at these points. The blade should now look like it’s glowing from within — brightest at the edges and centre, slightly deeper in colour across the flat surfaces.
Step 4: Start the OSL on the hand and guard. Now paint the glow on the surfaces nearest the blade. Mix your glow colour very thin (more medium/water than paint) and apply glazes to the sword guard, the hand holding the sword, and the wrist area. Each glaze should be barely visible — if you can see an obvious colour change from a single glaze, your paint is too thick.
Step 5: Extend the glow outward. Apply progressively thinner glazes to surfaces further from the blade — the forearm, upper arm, chest area nearest the sword, and any other surfaces that face the blade. Each successive area should receive fewer glazes than the one before it, creating a natural fall-off of light intensity. The forearm might get five glazes; the upper arm three; the chest one or two.
Step 6: Check your light logic. Step back and evaluate. Does the glow only appear on surfaces that face the sword? Is the intensity strongest near the source and weaker further away? Are there any surfaces that should be in shadow but are receiving glow? Correct any logical errors now, before the paint is fully dry.
Step 7: Final highlights. Add a final bright spot on the surfaces closest to the blade — a tiny dot or line of your brightest glow mix on the sword guard, the fingertips, and the nearest edge of the arm armour. These final highlights sell the illusion by creating “hotspots” where the light is most concentrated.
How to Paint Glowing Eyes
Glowing eyes are the most common glow effect on miniatures and one of the most impactful. A model with glowing eyes immediately gains character and menace, whether it’s a Space Marine’s red helm lenses or a Necron’s eerie green optical sensors.
Step 1: Paint the eye sockets black. Start with a dark base in the eye socket. This provides maximum contrast when you add the bright eye colour on top.
Step 2: Paint the eyes white. Apply pure white to the eye lenses, keeping within the socket boundaries. This white base maximises the brightness of the glow colour.
Step 3: Glaze the eyes with your colour. Apply your glow colour as a thin glaze over the white eyes. One or two glazes are usually enough — the eyes should be bright and saturated. For red eyes, use a bright red like Wild Rider Red. For green, use Moot Green. For blue, use Baharroth Blue.
Step 4: Add the glow to the face. This is what separates glowing eyes from merely bright eyes. Using a very thin glaze of your eye colour, apply a subtle glow to the area immediately around each eye — the brow ridge above, the cheek below, and the nose bridge between. The key word is subtle. You’re simulating reflected light, not painting the entire face in the eye colour.
Step 5: Add a white dot. Place a tiny dot of pure white at the centre of each eye lens. This creates a specular highlight that makes the eye look like it’s actually emitting light rather than simply being a painted colour. This single dot makes an enormous difference.
How to Paint Plasma Glow
Plasma weapons are among the most popular subjects for glow effects. The blue-white plasma coils provide a natural, lore-appropriate light source that illuminates the surrounding model.
Step 1: Base the coils white. Paint the plasma coils pure white as the starting point for the glow effect.
Step 2: Glaze with blue. Apply thin glazes of bright blue over the white coils. Concentrate the blue in the recesses between the coils, leaving the raised ridges of each coil closest to white. This creates the appearance of concentrated energy between the coils with the hottest plasma at the surface.
Step 3: Add the OSL. Glaze the gun casing, the Marine’s hand, arm, and chest with progressively thinner blue glazes. The area immediately around the plasma coils should have noticeable blue tinting. The arm holding the gun should have a subtle blue cast. The chest should have the faintest suggestion of blue on the side nearest the weapon.
Step 4: Consider the underside. Plasma guns are typically held at chest height, meaning the glow would light the underside of the chin, the bottom of the arm guard, and the inner surface of the chest armour. Applying subtle glow to these undersides makes the effect dramatically more convincing because it follows the actual physics of light from a source held at that height.
Tips for Better Glow Effects
Several principles improve glow effects regardless of the specific technique or colour.
Contrast is everything. A glow effect only looks like a glow if the surrounding areas are darker. If the entire model is bright, nothing looks like it’s glowing. Either darken the areas around the glow source or paint the model in a generally dark colour scheme. The brighter the glow needs to appear, the darker the surrounding surfaces should be.
Less coverage means stronger effect. Counterintuitively, limiting the area affected by the glow makes it look more intense. A glow that touches everything looks flat and unconvincing. A glow that sharply illuminates nearby surfaces and quickly falls off looks concentrated and powerful. Keep your glow effects tight and focused.
Thin is always better. Every glow glaze should be nearly invisible on its own. If you can see a dramatic colour shift from a single glaze, your paint is too thick. The beauty of the glaze technique is the smooth, gradual transition it creates when multiple transparent layers overlap. Thick paint creates hard edges that break the glow illusion.
Respect the shadows. Real light doesn’t illuminate everything equally. Surfaces that face away from the light source should receive no glow at all — they remain in their normal colours or even darker to compensate. Leaving these shadow areas untouched is just as important as painting the illuminated areas correctly.
Warm colours glow more easily than cool colours. Orange and yellow glow effects are more forgiving because the human eye naturally associates warm colours with light sources (fire, sunlight, lava). Blue and green glows require more precision because they’re less intuitive — the viewer’s brain needs more convincing that these colours represent emitted light.
Practice on spare bits first. Before committing to OSL on a prized model, practice on spare arms, weapons, or helmets from your bits box. Build confidence with the technique on low-stakes pieces before tackling your army’s centrepiece character.
Frequently Asked Questions
Can you really achieve airbrush-quality glow with just a brush?
Yes — brush-painted glow can match or even exceed airbrush quality, though it takes more time. The advantage of brush glazing is precision — you can control exactly where the glow falls with a level of detail that airbrushes cannot match. The disadvantage is time — an airbrush creates smooth gradients in seconds that take dozens of glazes by brush. For competition-level work, many award-winning painters prefer brush glazing because it offers greater control.
How many glaze layers does a typical glow effect need?
A convincing glow typically requires 8-15 glaze layers on the surfaces closest to the light source, with progressively fewer layers as distance increases. The exact number depends on how thin your glazes are — thinner glazes require more layers but produce smoother results. Each layer should dry completely (1-2 minutes for thin glazes) before the next is applied.
What’s the biggest mistake beginners make with glow effects?
Applying the glow colour too thickly and over too large an area. This creates a “colour wash” effect rather than a glow effect — the model looks like it was dipped in coloured paint rather than illuminated by a light source. The fix is simple: thin your paint more, apply fewer layers to distant surfaces, and maintain sharp boundaries between illuminated and shadow areas.
Does the model’s base colour affect the glow?
Significantly. Glow effects work best over dark base colours because the bright glow creates maximum contrast. On a black-armoured model, even a subtle glow is visible and dramatic. On a white-armoured model, glow effects require much more intensity to be visible, and they can look muddy if the glow colour is too similar to the base colour. Dark models make glow effects easier and more dramatic.
Can you combine glow effects with dry brushing instead of glazing?
Dry brushing can create glow effects, but the results are typically less smooth than glazing. Dry brushing deposits paint on raised edges and textures, which can create a sparkly rather than smooth glow effect. However, for rough, diffuse glow sources (like burning wreckage or glowing lava), dry brushing can actually look more appropriate than smooth glazing. For precise light sources (plasma, power weapons, eyes), glazing is the better technique.
Can you use Contrast or shade paints for glow effects?
Yes. Thinned Contrast paints and shades make good glow glazes because they’re already translucent and saturated. Thin them further with Contrast Medium or Lahmian Medium so each layer stays barely visible, and build them up over a white or very light base. Avoid using them straight from the pot on the surrounding armour, where they pool and leave hard edges instead of a smooth glow.