
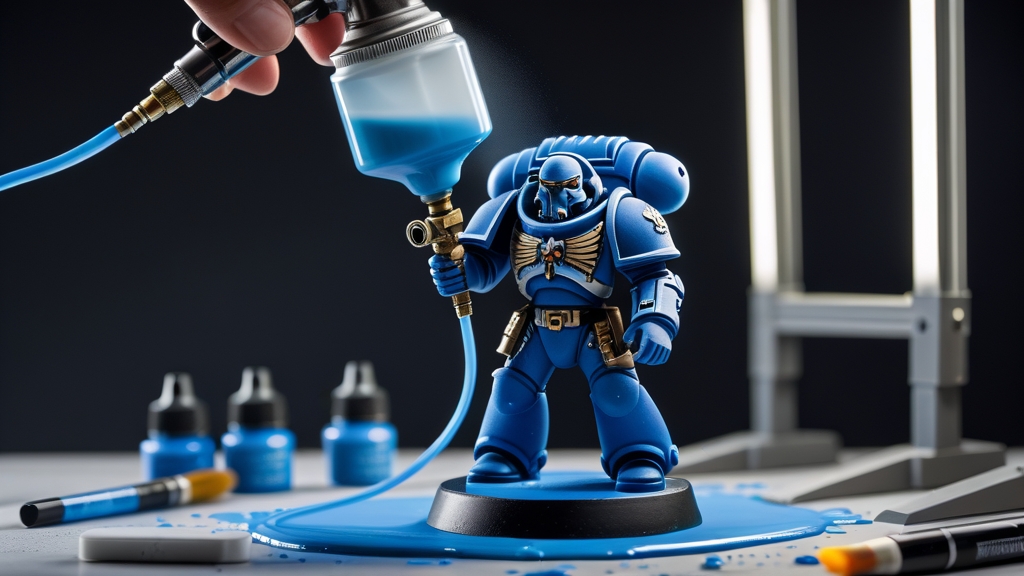
An airbrush applies thin, even coats of paint using compressed air. It’s the best tool for priming, basecoating, and creating smooth gradients on miniatures. Start with a 0.3mm needle dual-action airbrush and a compressor with a tank — this combination handles everything from priming entire armies to painting fine details on single models.
If you’ve been painting miniatures with a brush and want to level up your results, an airbrush is the single biggest upgrade you can make. It cuts priming and basecoating time by 80%, produces glass-smooth finishes impossible to achieve by hand, and opens up techniques like zenithal priming, colour modulation, and freehand camo patterns.
This tutorial covers everything a beginner needs — from choosing equipment to your first painting session. Every technique here works for Warhammer 40k, Age of Sigmar, historicals, and any other miniature scale.
What Equipment Do You Need to Start Airbrushing Miniatures?
You need four things to start airbrushing miniatures: an airbrush, a compressor, a spray booth or extraction system, and cleaning supplies. Here’s what to look for in each.
The Airbrush
Choose a dual-action, gravity-fed airbrush with a 0.3mm needle. Dual-action means the trigger controls both airflow (push down) and paint flow (pull back) simultaneously — this gives you precise control over spray patterns. Gravity-fed means the paint cup sits on top, which uses less air pressure and wastes less paint than siphon-fed models.
The 0.3mm needle is the sweet spot for miniatures. It’s fine enough for detail work but wide enough for efficient basecoating. Smaller needles (0.2mm) clog constantly with miniature paints, while larger ones (0.5mm) are too broad for most miniature work.
Recommended beginner airbrushes:
- Harder & Steenbeck Ultra — Best all-round starter. Reliable, easy to clean, excellent build quality. Around £80-100.
- Iwata Neo CN — Solid budget option with good parts availability. Around £50-70.
- Badger Patriot 105 — Workhorse airbrush, very forgiving of thick paint. Around £70-90.
- Harder & Steenbeck Infinity — Premium option if you want to buy once. Around £200+.
Avoid ultra-cheap airbrushes under £30. They have poor needle seating, inconsistent spray patterns, and will frustrate you into quitting before you learn the basics.
The Compressor
Get a compressor with a moisture trap and an air tank. The tank stores compressed air, which eliminates the pulsing you get from tankless compressors. Pulsing creates uneven spray patterns — fine for priming terrain, terrible for blending on a character model.
Set your pressure regulator to 15-25 PSI for most miniature work. Use 15-18 PSI for fine detail and glazing, 20-25 PSI for priming and basecoating. Some miniature painters go as low as 10 PSI for ultra-fine work, but this requires very thin paint and causes more clogs.
The AS186 compressor (sold under various brand names) is the hobby standard. It’s quiet, reliable, includes a tank, and costs around £80-120. More expensive compressors are quieter but don’t produce better results for miniature painting.
Spray Booth and Extraction
A spray booth captures overspray and paint particles. Even with water-based acrylic paints, you’re atomising pigment into the air — breathing this is harmful over time. A basic spray booth with an extraction fan and filter costs £40-60 and sits on your desk. Alternatively, spray near an open window with the airbrush pointed outward.
If you use solvent-based primers or lacquer-based paints, proper ventilation is essential. A respirator mask rated for organic vapours (3M 6000 series with organic vapour cartridges) is a worthwhile investment.
Cleaning Supplies
You’ll need airbrush cleaner (Vallejo or Createx brands work well), cotton buds, interdental brushes for the nozzle, and a cleaning pot. Cleaning takes 2-3 minutes between colours and is the single most important maintenance habit. A dirty airbrush sprays poorly and clogs constantly.
How Do You Thin Paint for an Airbrush?
Thin your paint to the consistency of semi-skimmed milk. When you lift the mixing stick, paint should flow off in a smooth stream — not drip in blobs (too thick) or run off like water (too thin). The standard ratio is roughly 1:1 paint to thinner for most acrylic miniature paints, but this varies by brand.
Thinning ratios by paint brand:
- Citadel Base/Layer — 1:1 to 1:1.5 with water or airbrush thinner
- Vallejo Model Color — 1:1 with Vallejo Airbrush Thinner
- Vallejo Model Air / Game Air — Ready to spray or add a few drops of thinner
- AK Interactive 3rd Gen — 1:1 with their thinner
- Scale75 — 1:1.5 (thick paint, needs more thinning)
- ProAcryl — 1:0.5 to 1:1 (already quite thin)
Use airbrush thinner, not just water. Airbrush thinner contains flow improver that helps paint atomise properly and reduces tip dry (paint drying on the needle tip). Vallejo Airbrush Thinner and Liquitex Airbrush Medium are both excellent. A drop of flow improver (Liquitex or Vallejo) added to any mix also helps.
Add thinner gradually. It’s easy to add more thinner — impossible to un-thin paint. Mix in the airbrush cup or in a separate palette well, stirring with a cocktail stick or old brush.
What Are the Best First Exercises for Airbrush Beginners?
Before touching a miniature, practise these three exercises on paper or cheap cardboard. They teach trigger control, which is the foundation of every airbrush technique.
Exercise 1: Dots. Hold the airbrush 2-3cm from the paper. Push down for air, then slowly pull back until a tiny dot appears. Release the trigger forward (stopping paint) before releasing air (stopping airflow). This trigger discipline — paint off before air off — prevents spattering. Practise making dots of consistent size.
Exercise 2: Lines. Draw thin, consistent lines by moving the airbrush steadily across the paper. Start the air flowing before you pull back paint, and stop the paint before you stop moving. This creates clean line ends without puddles. Try horizontal, vertical, and curved lines.
Exercise 3: Gradients. Spray a light colour at one end of the paper and gradually fade it out. Then spray a darker colour from the other end, overlapping in the middle. This teaches you how distance, trigger pull, and movement speed affect coverage. It’s the same technique you’ll use for colour modulation on miniatures.
Spend 30 minutes on these exercises before your first miniature session. The muscle memory transfers directly to painting models.
How Do You Prime Miniatures With an Airbrush?
Priming with an airbrush produces a thinner, smoother coat than spray cans — preserving more surface detail on your miniatures. Here’s the step-by-step process.
Step 1: Wash your miniatures in warm soapy water and let them dry completely. This removes mould release agent (especially on resin and Forge World models) that prevents primer adhesion.
Step 2: Load your airbrush cup with primer. Badger Stynylrez, Vallejo Surface Primer, and AK Interactive primers are all excellent through an airbrush. Most need little to no thinning — check the bottle. Citadel spray primers are not designed for airbrushes.
Step 3: Set your compressor to 20-25 PSI. Hold the airbrush 10-15cm from the miniature. Spray in short, sweeping passes — don’t try to cover everything in one pass. Rotate the miniature and hit it from multiple angles to reach recesses.
Step 4: Apply 2-3 thin coats rather than one thick coat. Each coat should look semi-transparent. Let each coat dry for 1-2 minutes before the next. The final result should show smooth, even coverage with all surface detail still crisp.
Common primer colours: black (forgiving, hides missed spots), grey (neutral, good for most colour schemes), white (best for bright/contrast paints), and coloured primers (pink for red schemes, brown for gold/warm metals).
How Do You Basecoat With an Airbrush?
Airbrush basecoating is where the real time savings happen. You can basecoat an entire squad in the time it takes to brush-paint one model. Thin your base paint to milk consistency (1:1 with thinner), set PSI to 15-20, and spray 2-3 thin coats over the primed miniature.
For armies with a dominant armour colour (Space Marines, Stormcast Eternals, Necrons), spray the entire model in the armour colour after priming. Then brush-paint the details — guns, cloth, skin, metallics. This hybrid approach (airbrush for large surfaces, brush for details) is how most competitive painters work.
For multicoloured models, mask off areas with Silly Putty, Blu-Tack, or liquid mask before spraying different sections. This takes practice but produces incredibly clean colour separations.
What Is Zenithal Priming and How Do You Do It With an Airbrush?
Zenithal priming creates a natural highlight map on your miniature before you apply any colour. Prime the model black, then spray grey from a 45-degree angle, then white from directly above. This mimics how light falls on the model from a light source overhead.
When you paint over a zenithal prime with translucent paints (Contrast, SpeedPaints, heavily thinned acrylics, or inks), the light-dark gradient shows through. Shadows appear in the recesses (where the black primer remains) and highlights appear on upper surfaces (where the white hit). It’s essentially free shading.
An airbrush produces a much smoother zenithal than spray cans. Use 15-18 PSI and thin, precise passes. The transition from black to white should be gradual, not a hard line. For a detailed walkthrough, see our full zenithal priming guide.
How Do You Varnish Miniatures With an Airbrush?
— /wp:heading –>Airbrush varnishing gives you complete control over the finish — matte, satin, or gloss — without the frosting risk of spray cans. Use Vallejo Matte Varnish, AK Interactive Ultra Matte, or Liquitex Matte Varnish thinned with airbrush thinner.
Set PSI to 18-22. Apply 2 thin coats from about 15cm distance. Let the first coat dry for 5 minutes before the second. For competition models, apply gloss varnish first (for maximum protection), then a matte coat over the top (for the desired finish). This gives you both durability and aesthetics.
Varnish at room temperature (18-24°C) with moderate humidity. Cold or humid conditions cause frosting — a white, chalky residue. If frosting occurs, a second coat applied in better conditions usually fixes it.
How Do You Clean an Airbrush Properly?
Clean your airbrush every time you change colour and do a deep clean after every session. Skipping cleaning is the number one cause of airbrush problems.
Quick clean (between colours): Empty the cup, add airbrush cleaner, backflush (cover the nozzle with a cloth and press the trigger — air pushes cleaner backwards through the paint channel), then spray the cleaner through onto paper until it runs clear. Takes 60-90 seconds.
Deep clean (after session): Remove the needle, nozzle, and nozzle cap. Soak small parts in airbrush cleaner for 10 minutes. Clean the paint channel with an interdental brush or pipe cleaner soaked in cleaner. Wipe the needle with a cloth dampened with cleaner (always wipe from back to tip to avoid bending). Reassemble, run clean water through to flush, and spray until clear.
Dried paint in the nozzle is the most common clog. An ultrasonic cleaner filled with water and a drop of Simple Green removes even stubborn dried paint in minutes.
What Are the Most Common Airbrush Problems and How Do You Fix Them?
Every airbrush beginner hits the same problems. Here’s how to diagnose and fix them.
Spattering / speckling: Paint comes out in blobs instead of a fine mist. Causes: paint too thick, PSI too low, dried paint on needle tip (tip dry). Fix: thin paint more, increase PSI by 5, wipe the needle tip with a damp cotton bud.
Spider-webbing: Paint goes on in stringy, web-like patterns. Cause: paint far too thin or PSI too high. Fix: add more paint to the mix, reduce PSI.
Orange peel texture: The surface looks bumpy like orange peel. Causes: spraying too close, paint too thick, or drying before it hits the surface (usually in hot/dry conditions). Fix: increase distance, thin paint more, add retarder medium.
No paint coming out: Air flows but no paint sprays. Causes: clogged nozzle, paint too thick, needle seated too far forward. Fix: clean the nozzle, thin paint, pull needle back slightly.
Bubbling in the cup: Air pushes back through the paint cup, creating bubbles. Cause: blockage in the nozzle forcing air backward. Fix: remove and clean the nozzle. Check for dried paint blocking the air cap.
Tip dry: Paint dries on the needle tip, causing intermittent spraying. This is normal with acrylic paints. Fix: add flow improver or retarder to your paint mix. Wipe the needle tip every few minutes while painting. Some painters keep a small cup of water nearby and dip the needle tip periodically.
Frequently Asked Questions
How much does it cost to start airbrushing miniatures?
A complete beginner setup costs £150-250: airbrush (£50-100), compressor with tank (£80-120), spray booth (£40-60), and cleaning supplies (£15-20). You can start cheaper with a budget airbrush and no spray booth, but expect to upgrade within 6 months.
Can you use Citadel paints in an airbrush?
Yes, but they need heavy thinning. Citadel Base paints need about 1:1.5 ratio with airbrush thinner. Citadel Layer paints need about 1:1. Citadel Contrast paints work well through an airbrush at about 1:0.5 over a zenithal prime. Citadel Air paints are pre-thinned for airbrush use.
Is an airbrush worth it for beginners?
Yes, if you plan to paint regularly. The learning curve takes 3-5 sessions to get comfortable, but after that you’ll prime and basecoat faster, achieve smoother results, and unlock techniques that are impossible with a brush alone. If you only paint occasionally, a spray can and brush is more practical.
What PSI should you use for miniature painting?
Use 15-25 PSI for most miniature work. Start at 20 PSI and adjust from there. Lower PSI (15-18) gives finer control for detail work and glazing. Higher PSI (22-25) is better for priming and basecoating. The optimal pressure depends on paint thickness — thicker paint needs higher PSI.
How far should the airbrush be from the miniature?
Hold the airbrush 5-15cm from the miniature for most work. Closer (2-5cm) for fine lines and details. Further (10-15cm) for broad coverage and priming. Moving closer narrows the spray pattern but increases intensity — you’ll cover a smaller area but with more paint per pass.
Do you need to thin airbrush-ready paints?
Most airbrush-ready paints (Vallejo Model Air, Citadel Air, AK 3rd Gen Air) spray well straight from the bottle, but adding a few drops of thinner or flow improver usually improves atomisation. They’re a great starting point for beginners who want to avoid the thinning learning curve.
Can you use canned air instead of a compressor?
You can, but it’s a poor long-term choice. Cans of propellant run out quickly and lose pressure as they get cold during use, which makes the spray pattern inconsistent. They’re fine for trying an airbrush out once, but a compressor with a tank like the AS186 is far cheaper and more reliable over time.
Can you spray metallic paints through an airbrush?
Yes. Metallic paints spray well and give a very smooth finish, especially for priming or basecoating armour and vehicles. The metal flakes can clog fine needles, so a 0.3mm needle or larger is safer than 0.2mm. Thin them like other paints, and clean the airbrush thoroughly afterwards, as flakes settle in the nozzle.
Related Content
- Warhammer Painting for Beginners — Everything You Need — essential painting guide for new hobbyists
- Best Paints for Warhammer — Complete Comparison Guide — recommended paints for Warhammer miniatures
- Object Source Lighting (OSL) — Complete Miniature Painting Guide — related painting technique and tutorial
- Drybrushing Tutorial — Fast Painting for Warhammer — popular drybrushing technique tutorial