
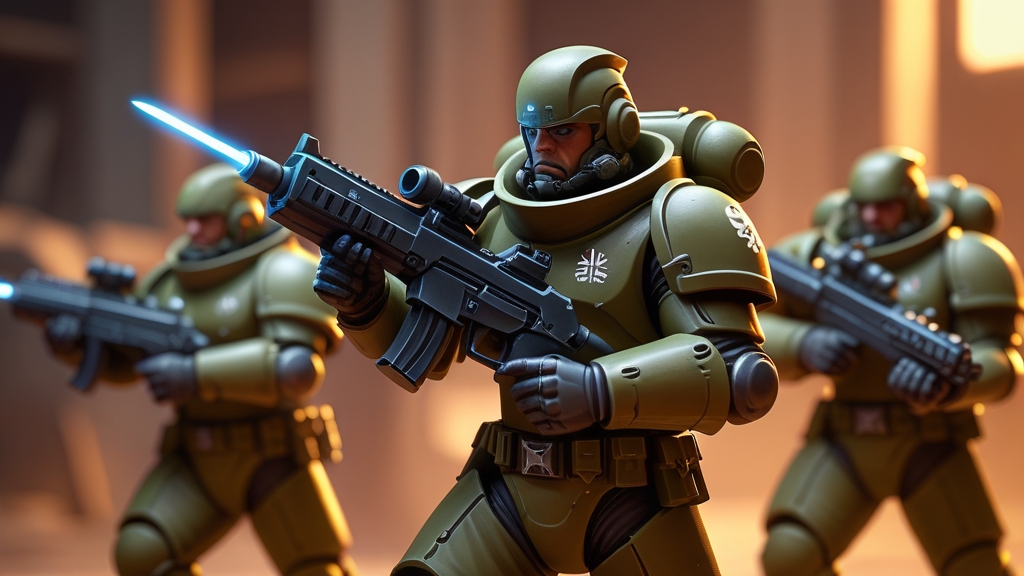
Part of our Astra Militarum hub: every Astra Militarum guide, lore page and painting tutorial in one place.
How to Paint Astra Militarum — Step by Step Guide
The Astra Militarum are the Imperium’s countless regiments of ordinary soldiers, and the classic way to paint them is the Cadian scheme: green armour plates over khaki fatigues, with dark metal lasguns and brown or black webbing. It’s a forgiving, very recognisable look that works just as well on a squad of Guardsmen as on a Leman Russ.
This guide walks through that Cadian scheme step by step, from paint list and priming through shading, layering, highlighting and basing, using Citadel paint names throughout. Because Guard armies are big, every step is written with batch painting in mind. At the end you’ll find quick palettes for Catachan, Krieg and Tallarn regiments.
Complete Paint List for Astra Militarum
Gather these Citadel paints before you start. The table is organised by area of the model.
| Paint Type | Paint Name | Purpose |
|---|---|---|
| Base | Castellan Green | Armour plates and helmets: base |
| Layer | Loren Forest | Armour plates: main layer |
| Layer | Straken Green | Armour plates: edge highlight |
| Base | Zandri Dust | Fatigues: base |
| Layer | Ushabti Bone | Fatigues: layer |
| Layer | Screaming Skull | Fatigues: highlight |
| Base | Morghast Bone | Pouches, bedrolls and other details: base |
| Base/Layer | Rakarth Flesh | Details: layer |
| Layer | Pallid Wych Flesh | Details: highlight |
| Base | Bugman’s Glow | Skin: base |
| Layer | Cadian Fleshtone / Kislev Flesh | Skin: layer and highlight |
| Base | Leadbelcher | Lasguns and metal: base |
| Layer | Ironbreaker | Metal: layer |
| Layer | Runefang Steel | Metal: edge highlight |
| Shade | Athonian Camoshade | Green armour shade |
| Shade | Agrax Earthshade | Fatigues and leather shade |
| Shade | Reikland Fleshshade | Skin shade |
| Shade | Nuln Oil | Metal shade |
| Spray | Chaos Black / Mechanicus Standard Grey | Primer |
Step-by-Step Painting Guide
Paint each step across a whole squad before moving on to the next. Guard armies have a lot of models, and working this way keeps colours consistent and speeds everything up.
Step 1: Preparation and Priming
Clean mould lines from your Guardsmen with a sharp hobby knife or mould line remover. Dry-fit components before gluing. For characters and heavy weapon teams, consider leaving weapons, backpacks or crew separate so you can reach recessed areas.
Prime with Chaos Black or Mechanicus Standard Grey spray. Hold the can about 20–30cm away and use several thin, sweeping passes rather than one heavy coat. Let it dry fully before handling, and touch up any missed spots with Abaddon Black. A dark primer gives you ready-made shadows in the deep folds of the fatigues and between the figures’ kit.
Step 2: Base Coats
Base coat each area in turn with thin, even coats, using two thin coats rather than one thick one:
- Castellan Green on the flak armour plates and helmets.
- Zandri Dust on the fatigues.
- Bugman’s Glow on hands and faces.
- Leadbelcher on lasgun casings and other metal.
- Morghast Bone on bedrolls and cloth details, and a dark brown or black on boots, webbing and lasgun furniture.
Don’t worry about being perfectly neat yet. Aim for solid coverage that still shows the sculpted detail; you’ll tidy up in later steps.
Step 3: Shading and Washes
Once the base coats are dry, shade each area with a wash that suits its colour:
- Athonian Camoshade over the green armour.
- Agrax Earthshade over the fatigues, bedrolls, boots and webbing.
- Reikland Fleshshade over the skin.
- Nuln Oil over the metal.
Guide the wash into the recesses rather than flooding flat panels. Let all shades dry completely before moving on, or they’ll lift when you paint over them.
Step 4: Layering
Now rebuild the colours on the raised areas, leaving the shade visible in the recesses:
- Loren Forest on the armour plates and helmets.
- Ushabti Bone on the raised folds of the fatigues.
- Rakarth Flesh on bedrolls and cloth details.
- Cadian Fleshtone on cheeks, nose, brow and knuckles.
- Ironbreaker on raised metal areas.
Use thin paint and build up opacity gradually. Two thin layers always look better than one thick one.
Step 5: Edge Highlighting
Using a fine detail brush, add Straken Green to the edges of the armour plates and the rim of each helmet. Highlight the highest fatigue folds with Screaming Skull, the details with Pallid Wych Flesh, and the skin with a small touch of Kislev Flesh. Finish the metal with Runefang Steel on the sharpest edges of the lasgun and other metal.
Hold the brush so the side of the bristles drags lightly along the edge. Prioritise upward-facing edges, which catch the most light on the tabletop; downward-facing ones can stay darker for a more natural look.
Step 6: Basing and Final Details
Apply Stirland Mud or Astrogranite Debris texture paint to the base, depending on whether you want an earthy or urban look. Once dry, drybrush with Tyrant Skull or Longbeard Grey to bring out the texture. Add tufts or small rocks for interest and paint the rim Abaddon Black or Steel Legion Drab.
Apply regiment and squad transfers, softening them with a decal-setting solution for a painted-on look. Pick out small details such as goggle lenses, vehicle lights or a lasgun’s charge indicator in a bright colour like Moot Green or Evil Sunz Scarlet, with a small white dot for a reflection.
Seal your finished models with a matt varnish to protect them during games.
Pro Tips for Painting Astra Militarum
- Batch painting: Paint 5–10 Guardsmen at a time, finishing each step across all of them before moving on. This keeps paint consistency uniform and speeds things up.
- Wet palette: A wet palette keeps paints workable for longer, which helps when you’re layering a whole squad.
- Brush care: Clean your brushes regularly and reshape the tips before storing them. A good point makes edge highlighting much easier.
- Subassembly: For characters, weapon teams and tanks, paint components separately before final assembly.
- Thin your paints: Guardsmen have lots of fine detail on webbing and kit. Thin coats preserve it and give smoother transitions.
- Tanks: Leman Russes, Chimeras and other vehicles can use the same green as the infantry’s armour, so the whole army ties together. An airbrush or a large brush makes the big panels much quicker.
Alternative Regiment Schemes
The same base, shade, layer and highlight process works for any regiment. These are quick starting palettes for three famous ones.
Catachan Jungle Fighters
Catachans are mostly bare, tanned skin with olive trousers and red bandanas. Base the skin with Bugman’s Glow, shade with Reikland Fleshshade and highlight with Cadian Fleshtone. Paint trousers Castellan Green or Deathworld Forest (add simple camo blotches if you like), and bandanas Mephiston Red shaded with Agrax Earthshade.
Death Korps of Krieg
Krieg troops wear long, dark greatcoats with brown leather and gas masks. A popular approach is a blue-grey coat: base The Fang, shade with Nuln Oil and highlight with Russ Grey. Paint leather straps and pouches a dark brown such as Rhinox Hide, and pick out the gas mask lenses in a bright accent colour.
Tallarn Desert Raiders
Tallarn suit sandy robes and brown equipment. Base the robes Baneblade Brown, shade with Agrax Earthshade and highlight with Karak Stone. Use a darker brown for belts and pouches, and textured sand bases to finish the desert look.
Frequently Asked Questions
What primer should I use for Astra Militarum?
Chaos Black or Mechanicus Standard Grey spray work well for the Cadian scheme, giving natural shadows in the recesses. If you plan to use Contrast paints, prime with Grey Seer or Wraithbone instead.
How long does it take to paint an Astra Militarum army?
A full Astra Militarum army takes a long time, because Guard armies have more models than most. Expect dozens of hours for a tabletop-standard 2,000-point force, depending on your speed and the standard you’re aiming for. Batch painting in groups of 5–10 models is the most efficient approach, and Contrast paints can cut the time considerably.
Can I use Contrast paints for Astra Militarum?
Yes, and they suit a big infantry army very well. Over a Wraithbone or Grey Seer primer, try Militarum Green Contrast on the armour plates and Skeleton Horde Contrast on the fatigues. Note that Castellan Green is a Base paint, not a Contrast paint; Militarum Green is the nearest Contrast equivalent.
What are the most important colours to buy first?
Start with the essentials: Castellan Green, Zandri Dust, Leadbelcher, Bugman’s Glow and Agrax Earthshade. These will get a squad base-coated and shaded. Add the layer and highlight colours as your budget allows.
How do I paint the eyes on Astra Militarum models?
Most Guardsmen are better served by a simple approach: paint the eye as a thin dark line using Rhinox Hide or Abaddon Black, then tidy the surrounding skin. At tabletop distance this reads more naturally than whites and pupils. For goggles, gas masks or helmet lenses, use a bright colour like Moot Green or Evil Sunz Scarlet with a tiny dot of White Scar for a reflective gleam.
Should I use an airbrush for Astra Militarum?
An airbrush is excellent for base coating large surfaces quickly and creating smooth transitions, which is especially useful on tanks such as the Leman Russ and Chimera. It isn’t required, though: every technique in this guide can be done with standard brushes. If you do use one, it pairs well with zenithal priming.
What colours are Cadian Astra Militarum painted?
The classic Cadian scheme has green armour plates, khaki or tan fatigues and dark metal or brown equipment. In this guide that means Castellan Green highlighted with Loren Forest for the armour, and Zandri Dust built up through Ushabti Bone to Screaming Skull for the fatigues. Black or brown boots and webbing tie the scheme together.
How do you paint faces on Guardsmen?
Basecoat the skin with a mid flesh tone such as Bugman’s Glow or Cadian Fleshtone, wash with Reikland Fleshshade, then re-layer the cheeks, nose and brow with Cadian Fleshtone and finish with a small highlight of Kislev Flesh. Paint eyes as a thin dark line rather than whites and pupils; at tabletop distance it reads more naturally.
How do you paint lasguns on Astra Militarum?
Basecoat the lasgun casing with Leadbelcher or a dark grey, paint any furniture in brown or the army’s armour colour, then wash everything with Nuln Oil. Pick out edges and the barrel with a brighter silver. A spot of red or blue on the power pack or charge indicator adds a quick point of interest.
How do you paint camouflage on Guardsmen?
Paint the fatigues in your base colour first, then add blotches or stripes in one or two contrasting tones using a small brush or a torn sponge. Keep patterns large and simple, as fine camo becomes noise at tabletop distance. Finish with an all-over wash to unify the colours, then lightly re-highlight the raised folds.
Learn More About Astra Militarum
Now that you know how to paint your Astra Militarum army, find out how to play them on the tabletop. Our Astra Militarum faction guide covers the army’s background, key units and where to start.
Related Content
- Astra Militarum — Explore the full army guide
- Warhammer Painting for Beginners — Start with general painting tips
- Best Paints for Warhammer — Choose the right paints for your scheme
- How to Paint Space Marines — Learn core Space Marine painting techniques