
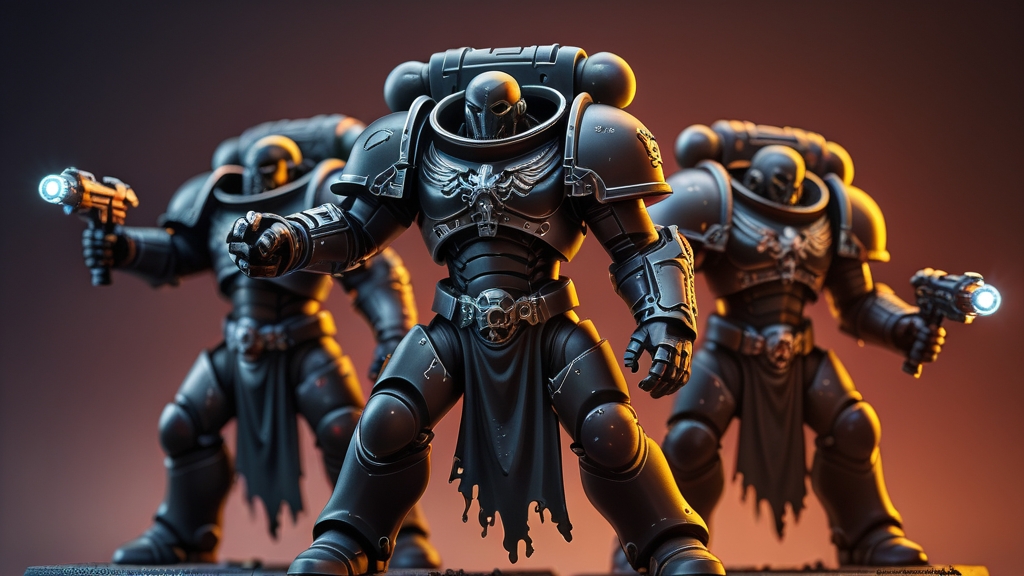
Part of our Iron Hands hub: every Iron Hands guide, lore page and painting tutorial in one place.
How to Paint Iron Hands — Step by Step Guide
Learning how to paint Iron Hands is a great way to master black armour, one of the trickiest colours in the hobby. The Iron Hands are known for their black power armour, cold steel bionics and clan markings, and a well-painted force looks grim and imposing on any table. This guide walks you through the paint list, base coating, shading, layering and highlighting, then basing and finishing touches, with specific Citadel paint names throughout.
Complete Paint List for Iron Hands
Gather these Citadel paints before you start. Each one is tied to a specific part of the model.
| Paint Type | Paint Name | Purpose |
|---|---|---|
| Spray | Chaos Black | Primer |
| Base | Abaddon Black | Armour base coat and primer touch-ups |
| Layer | Eshin Grey | Armour first edge highlight |
| Layer | Dawnstone | Armour final edge highlight |
| Base | Leadbelcher | Bionics, weapons and metal trim base |
| Layer | Ironbreaker | Metal midtone |
| Layer | Runefang Steel | Metal highlight |
| Layer | Stormhost Silver | Metal edge highlight on rivets and sharp edges |
| Base | Corvus Black | Pouches, holsters, cabling and gun casings |
| Layer | Skavenblight Dinge | Pouches, holsters and cabling highlight |
| Layer | Stormvermin Fur | Pouches, holsters and cabling final highlight |
| Shade | Nuln Oil | Shade for armour and metal |
| Shade | Agrax Earthshade | Shade for purity seals, parchment and any leather |
Step-by-Step Painting Guide
This guide breaks the process into manageable steps. Whether you are batch painting a full army or lavishing attention on a single character, they will help you get crisp black armour and convincing metal bionics.
Step 1: Preparation and Priming
Clean all mould lines with a sharp hobby knife or mould line remover, and dry-fit components before gluing. For subassembly painting, consider keeping backpacks, weapons or bionic arms separate so you can reach recessed areas.
Prime with Chaos Black spray. Hold the can about 20-30cm away and use several thin, sweeping passes rather than one heavy coat. Allow at least 30 minutes to dry before handling, and touch up any missed areas with Abaddon Black.
A black primer suits Iron Hands perfectly: it gives you natural shadows in every recess and most of the armour is already done.
Step 2: Base Coating
Apply Abaddon Black to the armour panels to give a smooth, even black over the primer. Use a medium base brush and two thin coats rather than one thick one, letting each dry before the next.
Base all metal areas (bionics, weapons, trim and exposed mechanical parts) with Leadbelcher, and the pouches, holsters, cabling and gun casings with Corvus Black. Don’t worry about being perfectly neat at this stage; you can tidy up with Abaddon Black later.
Step 3: Shading and Washes
Apply Nuln Oil to the metal areas so it flows into rivets, joints and panel lines. A thin coat of Nuln Oil over the armour also helps to unify the black and dull any patchy shine. Use Agrax Earthshade on purity seals, parchment and any leather.
Guide the shade into the recesses rather than flooding flat panels. Let everything dry completely before the next step, or the shade will lift when you paint over it.
Step 4: Layering the Metal and Details
Layer Ironbreaker over the raised areas of the metal, leaving the darker Leadbelcher and shade visible in the recesses. Then add Runefang Steel to the most prominent surfaces for a brighter, cleaner steel.
Layer the pouches, holsters and cabling with Skavenblight Dinge, keeping the Corvus Black in the recesses. This gives these areas a warm, dark grey-brown that separates them from the cooler black armour.
The key to good layering is patience: thin paint, a steady hand and gradual build-up.
Step 5: Edge Highlighting
Edge highlighting is what makes black armour read as armour rather than a dark silhouette. Using a fine detail brush, apply Eshin Grey to the edges of the armour panels, then a finer line of Dawnstone on the sharpest, upward-facing edges and corners.
Edge the pouches and cabling with Stormvermin Fur, and finish the metal with Stormhost Silver on rivets, bolt heads and the sharpest edges.
Hold your brush so the side of the bristles catches only the edge, and drag it lightly along. If you apply too much, go back with Abaddon Black to tidy up. Prioritise upward-facing edges and leave downward-facing ones darker for a more natural look.
Step 6: Basing and Final Details
Apply Stirland Mud or Astrogranite Debris texture paint to the base, depending on whether you want an earthy or urban look. Once dry, drybrush with Tyrant Skull or Longbeard Grey to bring out the texture.
Add small rocks or tufts for visual interest, and paint the base rim with Abaddon Black or Steel Legion Drab for a clean finish.
Apply transfers for clan and company markings, softening them with Micro Set and Micro Sol for a painted-on look. Add eye lenses (a bright colour like Moot Green or Evil Sunz Scarlet with a white dot for reflection) and any purity seals or scrollwork.
Seal your finished models with a matte varnish spray to protect your work during games.
Pro Tips for Painting Iron Hands
- Batch painting: Paint 5-10 Space Marines at a time. Complete each step across all models before moving on to keep paint consistency uniform and speed up the process.
- Wet palette: Keeps your paints workable for longer, which helps keep edge highlights consistent across a whole squad.
- Brush care: Clean your brushes regularly and reshape the tips before storing. A good point makes edge highlighting much easier.
- Subassembly: For characters, Dreadnoughts and vehicles, paint components separately before assembly.
- Restraint with highlights: Black looks best when most of each panel stays dark. Keep grey highlights thin and limited to the edges.
Variations on the Iron Hands Scheme
The Iron Hands scheme is fairly fixed — black armour with steel — but you can still give your army its own character. Clans are shown through markings and heraldry rather than a different armour colour, so the main choices are about finish and era.
Battle-worn and weathered
For a grimmer look, add rust and corrosion to older bionics and armour. Stipple Typhus Corrosion into recesses and joints, then add small patches of Ryza Rust on the raised edges of that texture. Chip the armour edges with a sponge and a little Leadbelcher. This suits veteran squads and Dreadnoughts especially well.
Horus Heresy Iron Hands
If you want a Heresy-era X Legion look, you can swap Abaddon Black for a dark metallic finish on the armour: base with Iron Warriors, shade with Nuln Oil and edge highlight with Ironbreaker and Stormhost Silver. It gives the army a colder, more mechanical feel and pairs well with heavy weathering.
Frequently Asked Questions
What primer should I use for Iron Hands?
Chaos Black spray primer is the best choice. It provides natural shadows and works as the deepest shade colour on black armour. If you are using Contrast paints, prime with Grey Seer or Wraithbone instead.
How long does it take to paint a Iron Hands army?
It depends on your army size, skill and the standard you are aiming for. A tabletop-standard Space Marine takes most painters an hour or two, while a character painted to display standard can take many hours. Batch painting in groups of 5-10 models is the most efficient approach.
Can I use Contrast paints for Iron Hands?
Yes. Black Templar Contrast over a Grey Seer or Wraithbone primer gives a quick black with built-in shading. Add a grey edge highlight afterwards to define the armour. The results differ from traditional layering, but they are excellent for tabletop armies.
What are the most important colours to buy first?
Start with the essentials: Abaddon Black, Eshin Grey, Nuln Oil and Leadbelcher. These four paints will get a solid, shaded army on the table. Add the highlight and detail colours as your budget allows.
How do I paint the eyes on Iron Hands models?
Paint the eye socket with Abaddon Black first, then carefully dot in the lens colour — Moot Green is a classic choice, or Evil Sunz Scarlet for a more aggressive look. Add a tiny dot of White Scar in one corner for a reflective gleam. Use your finest brush and brace your painting hand for stability.
Should I use an airbrush for Iron Hands?
An airbrush is excellent for base coating large surfaces quickly, especially on vehicles and Dreadnoughts. However, it is not required — every technique in this guide works with standard brushes. If you do use one, it pairs well with zenithal priming for natural lighting effects.
How do Iron Hands get their names?
Iron Hands names have a hard, clipped sound, which suits their bleak home world Medusa. Kardan Stronos and Iron Father Feirros are good examples. Pick a short given name and a harsh surname, and add a clan name for flavour if you like. Our Space Marine name generator can give you more options.
How do I paint black armour with a blue or grey highlight?
Basecoat Abaddon Black, then edge highlight with a cool grey such as Eshin Grey followed by Dawnstone for a neutral black, or with a dark blue-grey (Thunderhawk Blue works well) for a cold blue-black. Keep highlights to the top edges only. Black looks best when most of the panel stays dark.
How do I paint Iron Hands bionics?
Base bionics in Leadbelcher, shade with Nuln Oil, then pick out the edges with Ironbreaker or Stormhost Silver. For variety, do some augmetics in brass or gunmetal and add a little Typhus Corrosion or Ryza Rust on older parts. Contrast between clean steel and worn metal makes the bionics stand out against black armour.
Learn More About Iron Hands
Now that you know how to paint your Iron Hands army, find out how to play them on the tabletop. Check out our Iron Hands faction guide for their lore, units and list ideas for Warhammer 40,000.
Related Content
- Iron Hands — Explore the full army guide
- Warhammer Painting for Beginners — Start with general painting tips
- Best Paints for Warhammer — Choose the right paints for your scheme
- How to Paint Space Marines — Learn core Space Marine painting techniques