
Part of our T'au Empire hub: every T'au Empire guide, lore page and painting tutorial in one place.
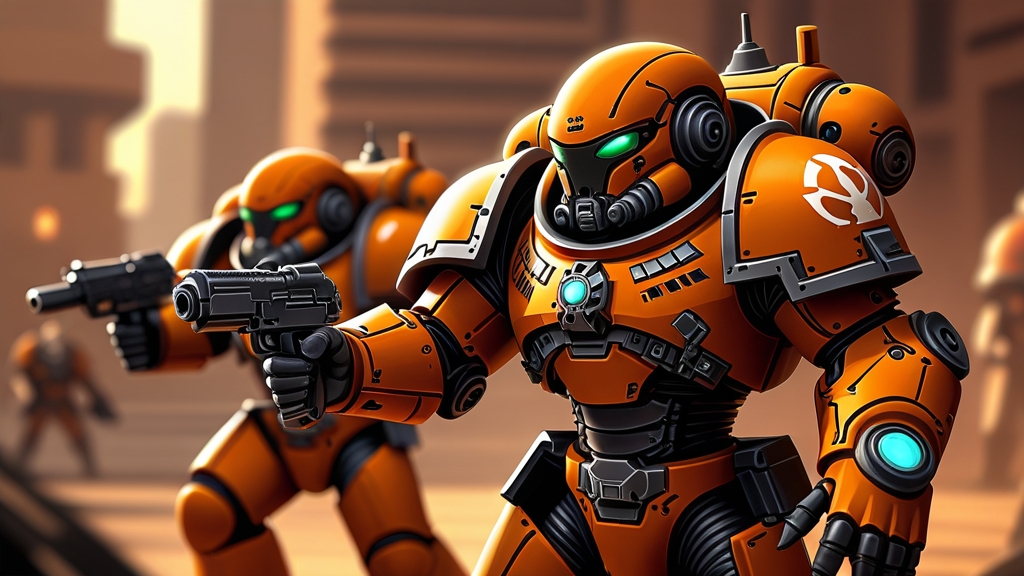
Learning how to paint T’au Empire is one of the most rewarding challenges in the Warhammer hobby. The classic T’au Sept scheme pairs warm ochre armour with dark grey undersuits and weapons, plus clean white markings, and it looks striking on any gaming table. Whether you are painting your first T’au Empire model or looking to improve your technique, this comprehensive guide walks you through every step of the process.
In this guide, we cover everything you need to know — from assembling your complete paint list, through base coating, shading, layering, and highlighting, all the way to basing and finishing touches. We also look at two popular alternative sept schemes. Every paint recommendation uses specific Citadel paint names so there is no guesswork involved.
Complete Paint List for T’au Empire
Before you start painting your T’au Empire army, gather these Citadel paints. Having everything ready before you begin will make the process smoother and more enjoyable.
| Paint Type | Paint Name | Purpose |
|---|---|---|
| Base | XV-88 | Primary armour/ base coat |
| Layer | Tau Light Ochre | Primary colour layer |
| Layer | Ungor Flesh | Edge highlights |
| Base | Abaddon Black | Undersuits, weapons and joints |
| Layer | Eshin Grey | Undersuit and weapon highlight |
| Layer | Dawnstone | Undersuit and weapon edge highlight |
| Base | Corax White | White markings base |
| Layer | Ulthuan Grey | White markings midtone |
| Layer | White Scar | White markings highlight |
| Base | Mephiston Red | Optional red details base |
| Layer | Evil Sunz Scarlet | Red details layer and lenses |
| Layer | Wild Rider Red | Red details highlight |
| Base | Leadbelcher | Metallic base |
| Layer | Ironbreaker | Metallic highlight |
| Layer | Runefang Steel | Metallic edge highlight |
| Shade | Agrax Earthshade | Ochre armour shade |
| Shade | Seraphim Sepia | Alternative, warmer armour shade |
| Shade | Nuln Oil | Metal and dark grey shade |
| Spray | Chaos Black / Mechanicus Standard Grey | Primer |
Step-by-Step Painting Guide
This guide breaks down the process of painting T’au Empire into manageable steps. Whether you are batch painting a full army or lavishing attention on a single character model, these steps will get you a clean T’au Sept scheme that looks great on the tabletop.
Step 1: Preparation and Priming
Begin by cleaning all mould lines from your Fire Warriors using a sharp hobby knife or mould line remover tool. Dry-fit all components before gluing to ensure proper alignment. For subassembly painting, consider keeping pulse rifles, drones or battlesuit weapon arms separate — this gives you better access to recessed areas that would otherwise be difficult to reach.
Prime your models with Chaos Black spray primer for this colour scheme. Hold the can approximately 20-30cm away and apply several thin, sweeping passes rather than one heavy coat. Allow the primer to cure fully for at least 30 minutes before handling. If you spot any areas the primer missed, touch them up with Abaddon Black applied with a brush.
A black primer works perfectly for T’au Empire because it naturally creates shadows in the recesses and gives you the dark undersuits and weapons almost for free.
Step 2: Base Coating the Primary Colours
Apply XV-88 to all the armour plates. Leave the undersuits, weapons and joints black for now. Use a medium-sized base brush (such as a Medium Base brush from Citadel) and apply two thin coats rather than one thick coat. Allow each coat to dry fully before applying the next — this prevents the paint from obscuring surface detail.
When applying the base coat, use smooth, controlled brush strokes that follow the contours of the model. Load your brush with paint, then wick off the excess on your palette until the paint flows smoothly without pooling. You want complete, even coverage while still being able to see the underlying sculpted details.
At this stage, do not worry about being perfectly neat. Focus on getting solid, opaque coverage on all the primary surfaces. You will clean up any mistakes in later steps.
Step 3: Shading and Washes
Once your base coats are fully dry, apply Agrax Earthshade shade to the primary surfaces. This is where your T’au Empire models really start to come alive. The shade paint flows into recesses, panel lines, and joints, creating natural-looking shadows that add tremendous depth.
Apply the shade with a medium shade brush, guiding it into the recesses rather than slathering it over flat panels. For a cleaner result, use the recess shading technique — carefully apply the shade only into the deepest recesses using a fine detail brush. This takes longer but produces a much smoother finish on the raised surfaces.
Seraphim Sepia is a good alternative on the armour if you want a warmer, more golden ochre. Use Nuln Oil on metallic areas and on the black undersuits and weapons. Allow all shades to dry completely before proceeding — rushing this step will cause the shade to lift when you paint over it.
Step 4: Layering and Building Up Colour
Now layer Tau Light Ochre over the primary surfaces, leaving the shade visible in the recesses. This is the most important step for creating a polished look. Load your brush with a small amount of paint, and apply it to the raised areas and flat panels while carefully avoiding the shaded recesses.
Layer Eshin Grey onto the raised areas of the undersuits and weapon casings. Paint any white markings with Corax White and smooth them with Ulthuan Grey, and pick out any red details with Mephiston Red and then Evil Sunz Scarlet.
Apply Ironbreaker to metallic areas, focusing on the raised surfaces while leaving the darker base coat visible in the recesses. This creates a convincing metallic sheen that catches the light naturally.
The key to good layering is patience. Use thin paint, a steady hand, and build up opacity gradually. Two thin layers will always look better than one thick one.
Step 5: Edge Highlighting
Edge highlighting is what separates a good paint job from a great one, and it is especially important for the crisp, hard-edged T’au armour. Using a fine detail brush, apply Ungor Flesh to the edges of all armour panels. Focus on the most prominent edges — the ones that would naturally catch the light.
Edge the undersuits and weapons with Dawnstone, the white markings with White Scar and any red details with Wild Rider Red. On metallic areas, use Runefang Steel for the finest highlights on rivets, bolt heads, and the sharpest edges.
Hold your brush perpendicular to the edge and drag it lightly along — the paint should only catch on the very edge of the surface. If you apply too much, you can always go back with the layer colour to tidy up. Practice on a less visible area first if you are not confident.
Prioritise the edges that face upward, as these catch the most light when the model is viewed on the tabletop. Downward-facing edges can be left darker for a more natural appearance.
Step 6: Basing and Final Details
A well-painted model deserves a well-finished base. Apply Stirland Mud or Astrogranite Debris texture paint to the base, depending on whether you want an earthy or urban look. Once dry, dry brush with Tyrant Skull or Longbeard Grey to bring out the texture.
Add tufts of static grass or small rocks for visual interest. Paint the base rim with Abaddon Black or Steel Legion Drab for a clean finish.
Finally, apply any transfers or decals. Soften them with Micro Sol and Micro Set for a painted-on look. Add final details like optics and sensor lenses (use a bright colour like Moot Green or Evil Sunz Scarlet with a white dot for reflection) and the glowing vents on battlesuits.
Seal your finished models with a matte varnish spray to protect your hard work during gaming.
Pro Tips for Painting T’au Empire
- Batch painting: Paint 5-10 Fire Warriors at a time for maximum efficiency. Complete each step across all models before moving to the next step — this keeps your paint consistency uniform and speeds up the overall process.
- Wet palette: Use a wet palette to keep your paints workable for longer. This is especially important when layering, as you need consistent paint thickness across the entire model.
- Brush care: Clean your brushes regularly during painting sessions and reshape the tips before storing. A good brush makes edge highlighting significantly easier.
- Subassembly: For character models or larger vehicles, paint components separately before assembly. This makes it much easier to reach all the details.
- Thin your paints: The golden rule of miniature painting applies doubly to T’au, whose large smooth armour plates show every brush stroke.
Alternative Colour Schemes for T’au Empire
The ochre T’au Sept scheme is the classic, but every sept and enclave has its own look, and custom septs are just as valid. The same steps above work for any of them. Only the palette changes. The codex and box art are the best reference for each scheme.
Farsight Enclaves
Commander Farsight’s breakaway enclaves are known for red armour with white details. Basecoat the armour with Khorne Red, shade with Nuln Oil, layer Mephiston Red and edge highlight with Wazdakka Red. Paint the white markings as in Step 4 and keep the undersuits dark grey to tie the scheme together.
Vior’la Sept
Vior’la is usually painted as pale, almost white armour with bold red markings. Prime with Wraithbone or Grey Seer, basecoat with Corax White, recess shade with a thin grey wash and highlight with White Scar. Use the red recipe above for the markings, and keep the undersuits dark for contrast.
Frequently Asked Questions
What primer should I use for T’au Empire?
Chaos Black spray primer is the best choice for the classic T’au Sept scheme, because it gives you the dark undersuits and weapons for free and provides natural shadows. For lighter alternative schemes, consider Grey Seer or Wraithbone primers instead.
How long does it take to paint a T’au Empire army?
A tabletop-ready T’au Empire army of around 2,000 points typically takes 40-80 hours depending on your skill level and the standard you are aiming for. Batch painting in groups of 5-10 models is the most efficient approach. A single model to a high display standard can take 5-15 hours.
Can I use Contrast paints for T’au Empire?
Yes, Contrast paints can significantly speed up the painting process. For T’au Sept ochre, try Aggaros Dunes Contrast over a Wraithbone primer, or Iyanden Yellow for a brighter, yellower look. Black Templar Contrast works well for the undersuits and weapons. While the results differ from traditional layering, Contrast paints produce excellent tabletop-quality results in a fraction of the time.
What are the most important colours to buy first?
Start with the essentials: XV-88, Tau Light Ochre, Agrax Earthshade and Eshin Grey. These four paints, plus your black primer, alone will let you get a solid base-coated and shaded army on the table. Add the highlight and accent colours as your budget allows.
How do I paint the lenses on T’au Empire models?
Paint the lens with Abaddon Black first, then carefully dot in the lens colour: Moot Green is a common choice for T’au optics and sensors, or Evil Sunz Scarlet for a more aggressive look. Add a tiny dot of White Scar in one corner for a reflective gleam. Use the finest brush you have and brace your painting hand against the model for stability.
Should I use an airbrush for T’au Empire?
An airbrush is excellent for base coating large surfaces quickly and creating smooth colour transitions, especially useful for vehicles and battlesuits. However, it is absolutely not required — every technique in this guide can be accomplished with standard brushes. If you do use an airbrush, it pairs brilliantly with zenithal priming for natural lighting effects.
How do I paint clean white panels on T’au battlesuits?
Basecoat with Corax White over a grey or white undercoat, or several thin coats of Ulthuan Grey over black. Shade lightly with a thin grey wash in the recesses only, then highlight with White Scar. Thin coats are vital, because white shows brush marks and uneven coverage more than any other colour.
Do T’au kits come with transfers?
Most plastic T’au Empire kits include a transfer sheet with sept symbols, numerals and unit markings. Apply them over a gloss-varnished surface with Micro Set and Micro Sol so the decal settles into the panel lines. Then seal with matte varnish to hide the transfer edges.
Learn More About T’au Empire
Now that you know how to paint your T’au Empire army, make sure you understand how to play them on the tabletop. Check out our comprehensive T’au Empire faction guide for army lists, strategies, and tactics that will help you dominate your games of Warhammer 40,000.
Related Content
- T’au Empire — Explore the full army guide
- Warhammer Painting for Beginners — Start with general painting tips
- Best Paints for Warhammer — Choose the right paints for your scheme
- How to Paint Space Marines — Learn core Space Marine painting techniques