
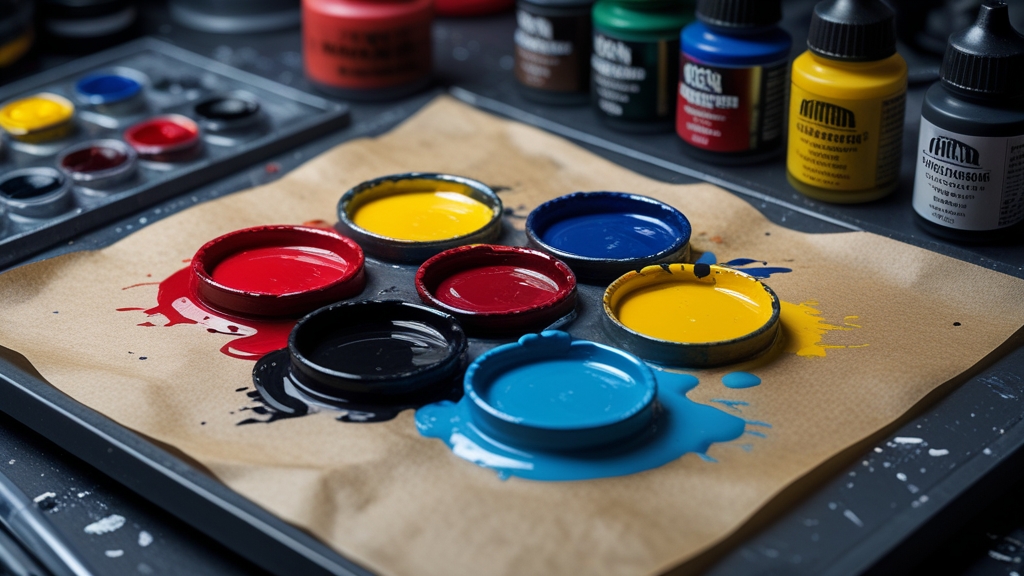
A wet palette keeps your acrylic miniature paints workable for hours — even days — by placing parchment paper over a damp sponge inside a sealed container. It is the single most important tool upgrade any miniature painter can make, and it costs almost nothing to build yourself. Once you start using a wet palette, you will never go back to squeezing paint onto a dry surface.
Every professional miniature painter uses a wet palette. It transforms how you paint by keeping paints at the perfect consistency, eliminating waste from dried-out paint, and making colour mixing dramatically easier. This tutorial covers everything from building a DIY wet palette for under £5 to choosing the best commercial options and troubleshooting common problems.
What Is a Wet Palette and How Does It Work?
A wet palette is a painting surface that keeps acrylic paints moist through capillary action. The basic construction is simple: a shallow container holds a sponge saturated with water, and a sheet of parchment (baking) paper sits on top. Water slowly wicks up through the paper, keeping the paint on the surface from drying out.
This works because acrylic paint dries through water evaporation. On a dry palette (a ceramic tile or plastic plate), paint begins drying within minutes — faster in warm or dry environments. On a wet palette, the constant moisture supply replaces water as it evaporates from the paint, keeping it fluid and workable for hours. When you close the lid, paints can stay usable for days or even a week.
The wet palette also naturally thins your paints slightly as water wicks into them from below. This produces a smoother, more consistent paint application straight from the palette without needing to manually thin with water every few minutes. For techniques like layering and glazing that depend on paint consistency, this is transformative.
How Do You Make a DIY Wet Palette?
Building a wet palette takes five minutes and costs almost nothing. You probably have everything you need at home already.
Materials
Container: Any shallow, airtight food container works. A rectangular takeaway container or Tupperware roughly 15×20cm is ideal. It needs a lid that seals reasonably well to keep the sponge from drying out between sessions.
Sponge: A standard kitchen sponge cut to fit the container base. Avoid sponges with a scouring pad on one side — use the plain foam type. You can also use folded paper towels (5-6 layers) if you don’t have a sponge, though they dry out faster.
Paper: Standard baking parchment paper (the kind used for lining baking trays) is the best and cheapest option. Cut a sheet to fit inside the container, sitting flat on the sponge. Do not use greaseproof paper, wax paper, or tracing paper — these don’t allow water to wick through properly.
Assembly Steps
1. Cut the sponge to fit snugly in the bottom of your container. It should cover the entire base without gaps.
2. Saturate the sponge with clean water. It should be thoroughly wet but not swimming — press it down and there should be minimal standing water around it. If water pools on top of the sponge, tip out the excess.
3. Cut a sheet of baking parchment to fit inside the container on top of the sponge. Leave about 5mm gap around the edges.
4. Place the parchment on the sponge and press it down gently to make full contact. If the paper curls up, soak it in water for 30 seconds first, then lay it flat on the sponge.
5. The surface should look damp but not have standing water on it. If water pools on the paper, press down gently and tip out the excess.
That’s it. Your wet palette is ready to use. Total cost: essentially free from household materials.
What Are the Best Commercial Wet Palettes?
Redgrass Studio Wet Palette
The Redgrass Studio wet palette is the gold standard for miniature painters. It comes in three sizes (Painter, Painter Lite, and Studio XL) with purpose-designed hydration sponge foam and proprietary palette paper. The seal is excellent, keeping paints wet for a week or more. The paper provides the ideal moisture level — wet enough to keep paint fluid without over-thinning. At £25-40 depending on size, it’s a significant upgrade over DIY versions. The Painter v2 is the most popular size for hobbyists.
Masterson Sta-Wet Palette
The Masterson Sta-Wet was the original commercial wet palette and remains popular, especially in North America. It’s larger than the Redgrass (better for artists painting on canvas) and cheaper at around £15-20. The included sponge and paper work well, though many miniature painters find the Masterson paper lets through too much water for small-scale work. Replacing the stock paper with baking parchment solves this.
Army Painter Wet Palette
Army Painter’s wet palette is affordable (around £15) and comes with 50 sheets of hydration paper and a decent sponge. It’s a solid entry-level option that works better than most DIY setups. The case is functional if unexciting, and replacement paper packs are readily available.
How Do You Load Paint onto a Wet Palette?
Squeeze a small blob of paint onto the parchment surface — about the size of a pea for a single model, or a bit more for batch painting. The paint will immediately begin absorbing moisture from below, naturally thinning slightly over the next minute or two.
Place different colours in separate areas of the palette with space between them to avoid accidental mixing. Most painters arrange colours in a rough spectrum or group related colours together. Leave the centre of the palette clear for mixing.
For Citadel paints, you’ll need to account for the thick consistency of some pots. Layer paints transfer well directly to the palette. Contrast paints and shades are already very thin and can become too watery on a wet palette — these are better applied from a dry palette or directly from the pot.
How Do You Thin Paint on a Wet Palette?
One of the greatest advantages of a wet palette is how easy it makes paint thinning. The paper provides a constant baseline of moisture, but you’ll often want to thin further for specific techniques.
To thin paint for layering, drag your brush through the paint blob and pull it to the side, working it into the paper surface. This gradually incorporates more water. You can also add a small drop of water to the palette next to your paint and mix from it — the wet palette prevents this water from evaporating as it would on a dry surface.
For glazing consistency (very thin, translucent paint), pull a small amount of paint away from the main blob and work it on the palette until it’s barely tinted. The wet palette excels here because the paint stays at your chosen consistency instead of drying and concentrating on the palette.
When mixing colours, the wet palette is incomparably better than a dry surface. You can blend two colours together, adjust the ratio gradually, and the mix stays workable for hours. On a dry palette, mixed colours dry before you finish using them.
How Do You Maintain a Wet Palette?
Between painting sessions: Close the lid. The airtight seal keeps the sponge moist and paints workable for days. Check the water level in the sponge every 2-3 days and top it up if it’s drying out.
Changing the paper: Replace the parchment paper when it becomes too covered in dried paint residue, starts growing mould, or has been in use for more than a week. With a DIY wet palette using baking paper, replacement costs virtually nothing.
Preventing mould: Mould is the main maintenance issue with wet palettes. The warm, moist environment is ideal for mould growth. Add a tiny drop of anti-mould solution or white vinegar to the sponge water to inhibit growth. Replace the paper at the first sign of dark spots or fuzzy growth. In hot weather, change the water every 3-4 days.
Cleaning the sponge: Rinse the sponge under running water every 1-2 weeks to flush out paint residue. Replace the sponge entirely if it becomes discoloured or develops an odour.
What Are Common Wet Palette Problems and Solutions?
Paint is too thin / watery
This usually means too much water in the sponge. Press the sponge down and tip out excess water until the surface is damp but not wet. You can also use a slightly thicker paper or double-layer the parchment. Some painters place a paper towel between the sponge and parchment to regulate moisture flow.
Paint dries out despite using a wet palette
Check that the sponge is adequately saturated and the paper is making full contact with it. Gaps between sponge and paper break the capillary connection. Also check your room conditions — fans, heaters, and air conditioning accelerate evaporation.
Paper curls up at the edges
Soak the parchment paper in water for 30-60 seconds before placing it on the sponge. This pre-saturates it and prevents curling. Some painters trim the paper slightly smaller than the container so the edges can tuck down alongside the sponge.
Metallic paints don’t work well
Metallic paints perform poorly on wet palettes because the excess moisture separates the metallic flakes from the binder. Use metallic paints from a dry palette (a ceramic tile works perfectly) or apply them directly from the pot.
Contrast paints and washes are too thin
These are pre-thinned products designed to flow into recesses. Additional moisture from a wet palette over-thins them. Keep a separate dry palette (or the pot lid) for washes, shades, and Contrast paints.
Frequently Asked Questions
Is a wet palette worth it for beginners?
Absolutely — a wet palette is arguably more valuable for beginners than experienced painters. Beginners struggle most with paint consistency, and a wet palette solves this automatically. Build a DIY version for free and experience the difference immediately. It is the single best improvement you can make to your painting setup.
Can you use a wet palette with Citadel paints?
Yes. Citadel Base, Layer, and Dry paints all work excellently on a wet palette. The only exceptions are Contrast paints, Shades, and Technical paints, which are already heavily thinned and become too watery on a wet palette. Use those from a dry surface.
How long do paints last on a wet palette?
With the lid closed, paints typically remain workable for 3-7 days depending on the palette quality, seal, and ambient conditions. Commercial palettes with good seals (Redgrass) can keep paints wet for over a week. Even open during a painting session, paints stay wet for 2-4 hours compared to 5-10 minutes on a dry palette.
Can you leave a wet palette out overnight?
Yes, provided you close the lid. An airtight lid is essential for overnight storage. The paints will be slightly thinner the next day from continued moisture absorption, but they’ll be perfectly usable. Just stir them briefly with your brush before painting.
Do professional miniature painters use wet palettes?
Almost universally, yes. Watch any painting tutorial from award-winning painters like Squidmar, Trovarion, or Vince Venturella — they all use wet palettes. It’s considered essential equipment at every skill level, and competition painters rely on them for the precise paint control needed for advanced techniques.
Related Content
- Warhammer Painting for Beginners — Everything You Need — essential painting guide for new hobbyists
- Best Paints for Warhammer — Complete Comparison Guide — recommended paints for Warhammer miniatures
- Object Source Lighting (OSL) — Complete Miniature Painting Guide — related painting technique and tutorial
- Drybrushing Tutorial — Fast Painting for Warhammer — popular drybrushing technique tutorial