
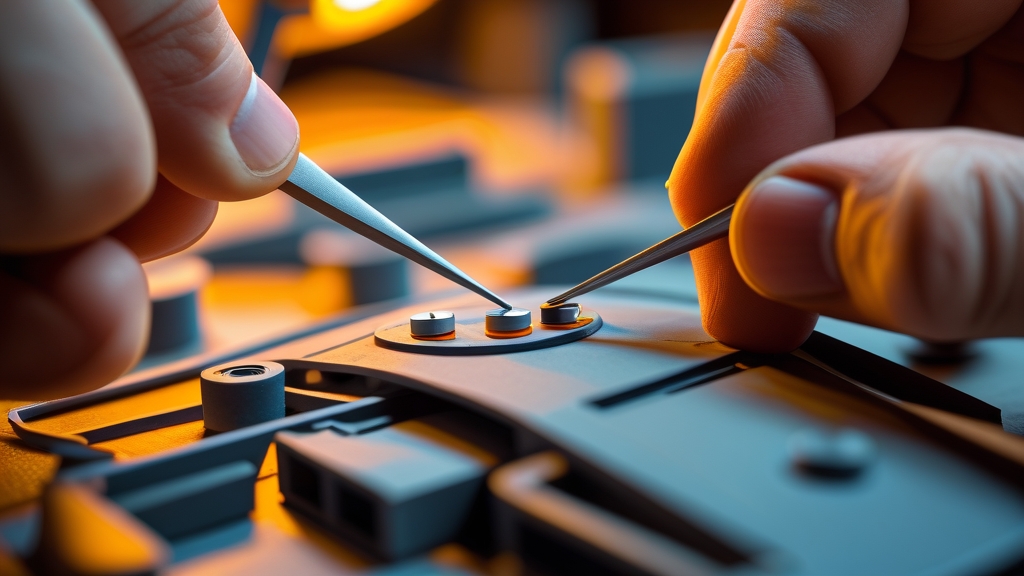
How to Magnetize Warhammer Models — Complete Guide
Magnetizing your Warhammer models is one of the smartest investments you can make in the hobby. Instead of gluing a weapon option permanently, you drill small holes, insert tiny magnets, and swap loadouts whenever you want. One model, infinite configurations — and when the meta shifts or a new codex drops, you don’t need to buy or build anything new.
This guide covers everything: why you should magnetize, what tools you need, which magnet sizes work for which models, a step-by-step tutorial, and the models that benefit most from magnetization.
Why Magnetize?
There are three compelling reasons to magnetize your models:
1. Save Money. A Redemptor Dreadnought kit comes with multiple weapon options but only enough parts to build one configuration. Without magnets, you’d need to buy multiple kits (or 3D print/buy bits) to try different loadouts. With magnets, one kit does everything. For expensive kits like Knights, this saves hundreds of pounds over time.
2. Adapt to Rules Changes. Games Workshop updates rules regularly. The weapon that’s dominant today might be terrible next season. If you’ve glued your models, you’re stuck with whatever you chose at assembly time. Magnetized models let you adapt instantly — swap the plasma for the melta, change the melee weapon, reconfigure your entire army list without touching a paintbrush.
3. Transport and Storage. Magnetized arms, weapons, and accessories can be removed for transport, reducing the risk of breakage. A Dreadnought with detachable arms fits into a much smaller case than one with arms permanently extended. For large models like Knights and vehicles, this is a significant practical advantage.
What You Need
The magnetizing toolkit is simple and relatively inexpensive:
Magnets
You need rare earth (neodymium) magnets. These are dramatically stronger than regular magnets and come in tiny sizes perfect for miniatures. The most common sizes for Warhammer are:
- 2mm x 1mm: Infantry arms, small weapon swaps, shoulder pads
- 3mm x 1mm: The workhorse size. Perfect for Space Marine arms, Crisis Suit weapons, medium model weapon swaps
- 3mm x 2mm: Heavier connections — Dreadnought arms, vehicle turrets, larger weapon mounts
- 5mm x 1mm or 5mm x 2mm: Large models — Knight weapon mounts, Carnifex arms, vehicle sponsons
- 6mm x 2mm: Very large connections — Knight torso rotation, super-heavy weapon mounts
Buy in bulk — a pack of 50-100 magnets costs a few pounds online and will last through many projects. Always have more than you think you need.
Pin Vice (Hand Drill)
A pin vice is a small hand-operated drill designed for miniature work. You’ll use this to drill holes in your models for the magnets to sit in. A good pin vice has a comfortable grip, a rotating head, and accepts standard drill bits. The Games Workshop pin vice works fine, but cheaper alternatives from hobby shops or Amazon are equally good.
Drill Bits
You need drill bits that match your magnet diameters exactly. For 3mm magnets, use a 3mm drill bit. For 2mm magnets, use a 2mm bit. Having the correct size is critical — too small and the magnet won’t fit, too large and it will be loose. Buy a set of micro drill bits in sizes from 1mm to 5mm to cover all your needs.
Super Glue (Cyanoacrylate)
Use super glue to secure magnets in their drilled holes. A precision applicator or gel formula gives you better control than standard liquid super glue. You want just enough to hold the magnet firmly without overflow that might interfere with the magnetic connection.
Hobby Knife and Files
For cleaning up drill holes, removing flash, and ensuring flat surfaces for magnetic contact. A standard hobby knife and a set of needle files are sufficient.
Marker Pen
For marking magnet polarity — this is essential. More on this below.
Magnet Sizes by Model Type
Here’s a quick reference for which magnet sizes work best for common Warhammer models:
Infantry (Space Marines, Guardsmen, Eldar): 2mm x 1mm for arm swaps. Small and unobtrusive, but strong enough to hold plastic arms securely.
Elite Infantry (Terminators, Crisis Suits, Gravis): 3mm x 1mm. The slightly larger size provides a stronger hold for chunkier models and heavier weapon options.
Dreadnoughts and Medium Walkers: 3mm x 2mm for arm weapons, 2mm x 1mm for smaller options like storm bolters or accessories. Dreadnoughts are the classic magnetizing project because they have multiple large weapon options that are all viable.
Vehicles (Leman Russ, Predator, Rhino variants): 3mm x 2mm for turret weapons, 5mm x 1mm for sponsons. Vehicle turrets often benefit from a larger magnet to prevent the weapon drooping.
Knights and Large Models: 5mm x 2mm or 6mm x 2mm for arm weapons. Knight kits come with enough options to build several different configurations, making them ideal magnetizing candidates.
Carnifexes and Tyranid Monsters: 3mm x 2mm for arm weapons. Tyranid monstrous creatures have extensive weapon options and benefit enormously from magnetization.
Step-by-Step Tutorial: Magnetizing a Dreadnought Arm
This tutorial uses a Redemptor Dreadnought as the example, but the technique applies to any model. We’re using 3mm x 2mm magnets for the main arm weapon swap.
Step 1: Identify Your Swap Points
Before you start drilling, dry-fit the model and identify exactly where the weapon connects to the body. For a Dreadnought, this is typically a ball-and-socket joint at the shoulder. You want to place your magnets at this connection point so the arm attaches and detaches cleanly.
Step 2: Mark the Drill Point
Use a hobby knife or a pin to mark the exact centre of the connection point on both the body and the arm. A small indent helps the drill bit grip and prevents it from skating across the surface.
Step 3: Drill the Hole
Using your pin vice with a 3mm drill bit, carefully drill into the marked point. Go slowly — let the drill bit do the work rather than forcing it. Drill deep enough for the magnet to sit flush with the surface (2mm deep for a 2mm thick magnet). Check the depth frequently by test-fitting a magnet.
Critical tip: Drill from the centre outward. If you start at an angle, the hole will be off-centre and the magnet won’t align properly. Keep the drill perpendicular to the surface at all times.
Step 4: Test Fit the Magnet
Before gluing, push a magnet into the hole to check the fit. It should sit flush or just below the surface. If it protrudes, drill slightly deeper. If the hole is too wide, you can add a thin ring of green stuff around the magnet to secure it.
Step 5: Check Polarity (CRITICAL)
This is where most beginners make mistakes. Before gluing any magnet, you must ensure the polarity is correct — the magnet in the body must attract the magnet in the arm, not repel it.
The simplest method: place a magnet in the body hole (don’t glue yet). Stack a second magnet on top of it — they will naturally orient to attract. Mark the top face of the stacked magnet with a marker pen. That marked face goes into the arm hole facing outward. Now the two magnets will always attract when the arm is attached.
Step 6: Glue the Magnets
Apply a small drop of super glue to the inside of the drilled hole. Press the magnet in with the correct polarity orientation. Use a spare magnet or a metal tool to push it flush — don’t use your fingers, as super glue and skin are not a combination you want. Let it cure for at least 5 minutes before handling.
Repeat for the corresponding hole in the arm, remembering to maintain correct polarity.
Step 7: Test and Refine
Once both magnets are set, test the connection. The arm should snap into place with a satisfying click and hold firmly when the model is picked up. If the hold is weak, you may need a thicker magnet (2mm instead of 1mm) or a second magnet stacked behind the first.
Marking Polarity — The System That Saves You
The single most important habit in magnetizing is consistent polarity marking. Here’s the system used by experienced hobbyists:
- Designate one face of every magnet as the “body” face and mark it with a dot of paint or marker.
- The marked face always goes into the model’s body/torso/hull — facing outward.
- The unmarked face always goes into the arm/weapon/accessory — facing outward.
- This means every arm is compatible with every body in your collection.
This system is essential if you’re magnetizing multiple models. Without it, you’ll inevitably glue a magnet in backward and discover that your new weapon repels instead of attracts. Fixing a wrongly-polarised magnet is difficult and risks damaging the model — far better to prevent the problem with consistent marking.
Common Mistakes and How to Avoid Them
Mistake 1: Wrong polarity. The magnet is in backward and repels instead of attracting. Prevention: always use the stacking method and mark your magnets before gluing. Fix: carefully pry the magnet out with a hobby knife (risky) or drill it out and re-do (safer but destructive).
Mistake 2: Drilling too deep. The magnet sits too far below the surface, weakening the connection. Prevention: check depth frequently while drilling. Fix: stack a second magnet on top of the first, or fill the excess depth with green stuff before inserting the magnet.
Mistake 3: Drilling off-centre. The hole is offset, causing the arm to sit at an angle. Prevention: always mark your drill point precisely and keep the drill perpendicular. Fix: fill the bad hole with green stuff, let it cure, re-mark, and re-drill.
Mistake 4: Using magnets that are too small. The connection is weak and the arm droops or falls off. Prevention: use the size guide above and test-fit before committing. Fix: drill wider and use a larger magnet, or stack a second magnet behind the first.
Mistake 5: Super glue overflow. Excess glue seeps onto the magnet face, reducing magnetic contact or gluing the arm permanently in place. Prevention: use minimal glue applied to the hole walls, not the magnet face. Fix: carefully scrape excess glue off the magnet face with a hobby knife.
Which Models Are Worth Magnetizing?
Not every model benefits equally from magnetization. Here are the best candidates — models where the effort pays off most:
Dreadnoughts (all patterns): The classic magnetizing project. Dreadnoughts have 4-6 weapon options per arm, all of which are competitively viable at different times. A single magnetized Dreadnought replaces 3-4 non-magnetized builds. Priority: Essential.
Imperial Knights / Chaos Knights: Knight kits cost £100+ and come with multiple weapon options. Magnetizing a Knight gives you access to every possible configuration from a single kit — that’s potentially £300-400 of value from one purchase. Priority: Essential.
T’au Crisis Suits: Crisis Suits have an absurd number of weapon combinations, and the optimal loadout changes with every balance update. Magnetizing the weapon hardpoints lets you adapt instantly. Priority: Highly recommended.
Tyranid Carnifexes: Carnifexes are sold in pairs and have extensive weapon options. Magnetizing both gives you maximum flexibility from one box. Priority: Highly recommended.
Vehicle Turrets: Leman Russ, Predator, and similar vehicles with interchangeable turret weapons are easy to magnetize and benefit significantly. Priority: Recommended.
Characters with Weapon Options: Some characters have meaningful weapon choices. Magnetizing these is quick and ensures you’re always running the optimal loadout. Priority: Nice to have.
Basic Infantry: Generally not worth magnetizing. The time investment per model is too high relative to the benefit, and individual infantry models are cheap enough to build multiple configurations. Priority: Skip unless you enjoy the process.
Frequently Asked Questions
Where do I buy magnets for Warhammer?
Amazon, eBay, and specialist hobby suppliers all sell neodymium magnets in the sizes you need. Search for “neodymium magnets 3mm x 1mm” or similar. Dedicated miniature hobby shops like Green Stuff World also sell magnet kits specifically sized for Warhammer models.
Can I magnetize a model that’s already assembled and painted?
Yes, but it’s more difficult. You’ll need to carefully cut the arm/weapon at the join, drill into both surfaces, and then touch up the paint. It’s always easier to magnetize during initial assembly, so plan ahead if you think you might want weapon swaps later.
How strong are the magnets? Will arms fall off during games?
Properly sized neodymium magnets are very strong for their size. A 3mm x 2mm magnet will hold a Dreadnought arm firmly enough that the model can be picked up by the arm without it detaching. For very heavy parts (Knight weapons), use 5mm or 6mm magnets for extra security.
Do magnets affect painting?
Magnets are metal and accept primer and paint just like the rest of the model. However, paint on the magnet faces will slightly reduce magnetic strength. For the strongest possible connection, keep the contact faces of your magnets paint-free by masking them before priming.
Can I use magnets with resin (Forge World) models?
Absolutely. The drilling technique is identical — resin is actually easier to drill than plastic. Just remember to wash the resin first and use super glue (plastic cement doesn’t work on resin). Pin the magnets if the resin around them is thin to prevent cracking.
What if I drill through the model?
It happens to everyone at least once. Fill the exit hole with green stuff, let it cure, and re-drill from the correct side to the right depth. If the damage is visible, sand and repaint the affected area. The fix is cosmetic — the magnet will still work fine.
How do I magnetise models for transport?
Glue a small magnet or a disc of steel under each base, then line your case or tray with magnetic or steel sheet. The models then grip the tray and won’t slide around in transit. It’s the cheapest way to protect a painted army and works with any base size. Use stronger magnets for heavy models, and keep any metal sheet away from other magnetised parts.
Are magnetised models allowed in tournaments?
Yes. Magnetised weapons are fine at events as long as the model shows the loadout you’re actually using, so swap to the right weapons before the game and make sure they stay attached during play. If a magnet is weak and arms keep falling off, fix it before the event, since loose parts slow games down and can cause disputes.
Related Content
- Drybrushing Tutorial — Fast highlighting technique
- Contrast Paints Guide — One-coat painting technique
- Painting for Beginners — Everything to get started
- Speed Painting — Paint armies fast