
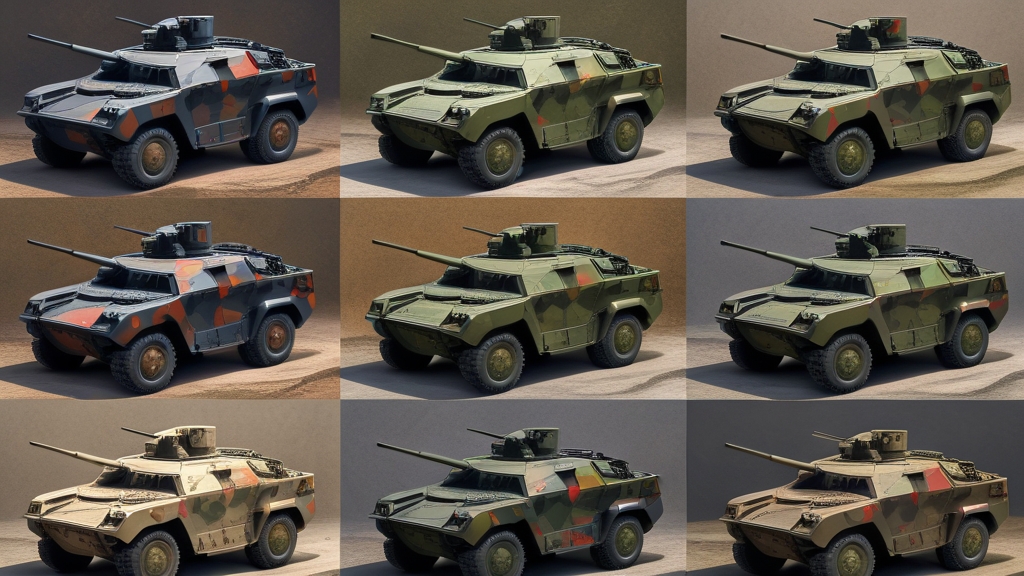
Paint camo by applying irregular blotches of 2-3 colours over a base colour using a fine brush or torn sponge. The key is randomness — avoid symmetry and vary blotch sizes. Common patterns: woodland (green/brown/black), urban (grey/dark grey/white), desert (tan/brown/cream). Camouflage is one of the most visually striking painting techniques for military-themed miniatures, and mastering it opens up a world of realistic colour schemes for Imperial Guard, Tau, Space Marine Scouts, and any force that values tactical concealment.
Camouflage painting intimidates many hobbyists because it looks complex on the finished model. But the technique is actually simpler than it appears — the randomness that makes camo effective in the real world also makes it forgiving for painters. Unlike a precisely blended highlight that reveals every brushstroke error, camouflage patterns actively hide minor painting imperfections. Irregular edges, uneven coverage, and inconsistent blotch sizes all contribute to a more realistic pattern.
What Makes Good Camouflage?
Understanding real-world camouflage principles will dramatically improve your miniature camo painting. Real camouflage works by breaking up the silhouette of an object — the eye sees a collection of irregular shapes rather than recognising the outline of a vehicle or person.
The three key principles are pattern disruption, colour matching, and scale appropriateness.
Pattern disruption means the camo blotches should cross the model’s edges and structural lines. A camo pattern that respects panel lines and armour boundaries looks painted-on rather than functional. Real camo is sprayed or painted across the entire vehicle regardless of where panels meet, and your miniature camo should do the same.
Colour matching means the colours should plausibly belong in the environment the model is meant to operate in. Woodland camo uses greens and browns because forests contain green vegetation and brown earth. Desert camo uses tans and creams because deserts are sandy. Urban camo uses greys because cities are predominantly concrete and asphalt. Choose colours that make environmental sense.
Scale appropriateness is specific to miniature painting. Real camouflage patterns on a full-sized tank have blotches measured in feet. Scaled down to 28mm, those blotches would be tiny — perhaps 2-3mm across. Many hobbyists paint their camo blotches too large, creating a pattern that looks like it belongs on a vehicle five times the model’s implied size. Keep your blotches smaller than you think they should be.
What Tools Do You Need?
Camouflage can be painted with basic hobby tools. No specialised equipment is required.
A fine detail brush (size 0 or 1) is essential for painting camo blotches by hand. The brush should hold enough paint to apply a blotch without reloading, but the tip should be fine enough to create irregular edges. Some painters prefer slightly worn brushes for camo work because the imperfect tip naturally creates the irregular edges that make camo look realistic.
Torn sponge (from blister packs or packing material) creates an excellent random pattern when dipped in paint and dabbed onto the model. The sponge’s irregular surface naturally produces the random, organic shapes that are hardest to replicate with a brush. This is the fastest method for painting camo and often produces the most realistic results.
Blu-tack or masking putty can be used to create hard-edged camo patterns. Press small pieces onto the model, paint over them, then remove them to reveal the base colour underneath. This creates the crisp, geometric edges seen in some military camouflage schemes (like the US Woodland pattern).
A reference image is the most useful tool of all. Find photos of real-world camouflage in the pattern you want to replicate and keep them visible while painting. Studying real camo prevents you from falling into the common trap of making patterns too regular, too symmetrical, or too large-scale.
Step-by-Step: Painting Woodland Camouflage
Woodland camo is the most versatile pattern and an excellent starting point for learning camo painting.
Step 1: Apply the base colour. Paint the entire model in the lightest camo colour — typically a mid-green (Castellan Green or Vallejo Olive Drab). Apply this evenly with full coverage. This base colour will show through between the darker blotches, so it needs to be smooth and consistent. Two thin coats are better than one thick one.
Step 2: Add the second colour. Using dark brown (Rhinox Hide or similar), apply irregular blotches over the green base. Each blotch should be roughly 3-5mm across at 28mm scale, with irregular edges — think amoeba shapes rather than circles or ovals. Cover approximately 25-30% of the surface. Space the blotches randomly, avoiding any pattern or symmetry. Some blotches should overlap panel lines and wrap around edges.
Step 3: Add the third colour. Using black or very dark green, add smaller blotches that partially overlap both the green base and the brown blotches. These dark shapes should cover about 15-20% of the surface. They should be generally smaller than the brown blotches, creating visual variety in scale. The overlap between colours creates natural-looking transitions where the camo colours meet.
Step 4: Optional fourth colour. Some woodland patterns include a light tan or khaki accent. Apply small blotches (5-10% coverage) of Zandri Dust or similar. These light spots break up the overall dark appearance and add depth to the pattern. Place them randomly, sometimes overlapping other colours.
Step 5: Apply shading. Wash the entire model with a thinned dark wash (Agrax Earthshade or Nuln Oil mixed with medium). This ties the different camo colours together and adds shadow to recesses. Without this step, the flat camo colours can look toy-like. The wash provides the depth and cohesion that makes the pattern look like painted-on camouflage rather than a patchwork quilt.
Step 6: Edge highlight. Lightly highlight the model’s edges with a colour slightly lighter than your base green. This step is optional and subtle — you want to define the model’s shape without breaking the camo pattern. Keep highlights very thin and only on the sharpest edges.
How to Paint Desert Camouflage
Desert camo uses warm, sandy tones that reflect arid environments. The overall palette is much lighter than woodland camo.
Start with a base of sand or light tan (Zandri Dust, Vallejo Iraqi Sand). Apply the second colour in medium brown (Steel Legion Drab, Baneblade Brown) in broad, soft-edged blotches covering about 30% of the surface. The third colour should be either a darker brown (Mournfang Brown) or a cream/off-white (Screaming Skull) in smaller blotches.
Desert camo patterns tend to have softer, more organic edges than woodland patterns. Real desert camo is often sprayed rather than stencilled, creating gradual transitions between colours. To replicate this with a brush, thin your camo colours slightly and apply them with a semi-dry brush, dabbing rather than stroking. The resulting soft edges look more natural for desert environments.
Desert vehicles typically show significant dust weathering, which further softens the camo pattern. After painting the camo, apply a light drybrush of Screaming Skull or Pallid Wych Flesh over the entire model to simulate accumulated desert dust. This ties the camo colours together and adds environmental realism.
How to Paint Urban Camouflage
Urban camo uses cool greys to match concrete and asphalt environments. It’s particularly effective on Imperial Guard vehicles operating in hive city environments.
Base with medium grey (Dawnstone or Mechanicus Standard Grey). Add blotches of dark grey (Eshin Grey) and light grey or white (Administratum Grey, Celestra Grey). Some urban patterns include a dark blue-grey accent (The Fang) that represents shadow and glass reflections.
Urban camo often features more geometric shapes than natural-environment patterns. Real urban camo sometimes uses angular, pixelated shapes rather than organic blotches. To replicate this, use a fine brush to paint more angular, blocky shapes with straighter edges. Alternatively, use small pieces of masking tape at angles to create the hard edges typical of digital-pattern urban camo.
The Sponge Technique
Sponge camouflage is the fastest and often the most effective method for painting camo patterns.
Tear a piece of blister pack foam into a small, irregular shape — roughly the size of your thumbnail. The torn edge creates a random texture that produces natural-looking camo blotches.
Dip the sponge lightly into your camo colour. Dab off most of the paint onto paper or your palette — you want very little paint on the sponge, similar to preparing for dry brushing. Too much paint creates solid blotches with no texture; too little creates faint, dusty marks. The sweet spot is a light coverage that shows the sponge’s texture.
Dab the sponge onto the model with a light, straight-down motion. Don’t drag or twist — just press and lift. Rotate the sponge between dabs to avoid repeating the same texture pattern. The result is a random pattern of irregular shapes with naturally textured edges that are very difficult to replicate with a brush.
Layer colours with the sponge just as you would with a brush — lighter base, darker overlays. The sponge technique is particularly effective for worn, faded camo that has been exposed to weather and combat damage. The texture it naturally creates suggests paint that has been weathered and partially stripped away.
How to Paint Camo on Infantry
Camouflage on infantry models requires a different approach than vehicles because of the dramatically smaller surface area.
Scale down aggressively. Camo blotches on infantry should be 1-2mm across — barely larger than the tip of a fine brush. Real-world infantry camo patterns are small enough that individual blotches are difficult to distinguish at any distance beyond a few metres. At 28mm scale, this means tiny dots and dashes rather than the broad blotches used on vehicles.
Focus on major surfaces. Infantry models have limited flat surface area — mostly the torso, legs, and any cloaks or packs. Apply your camo pattern to these larger areas and leave smaller details (belts, pouches, weapons) in solid colours. Trying to paint camo on every surface creates visual noise that overwhelms the model.
Use a fine-tip brush exclusively. The sponge technique rarely works well at infantry scale because even small sponge pieces create blotches that are too large relative to the model. A fine-tip brush (size 0 or smaller) loaded with a small amount of paint allows you to place individual tiny blotches with precision.
Simplify the palette. Two colours over a base are usually sufficient for infantry camo. The smaller surface area means a three or four-colour pattern can look cluttered. Base green with brown blotches creates effective woodland camo. Base sand with brown blotches creates clean desert camo. Simplicity reads better at gaming distance.
Frequently Asked Questions
Should camo be applied before or after shading and highlighting?
Apply the camo pattern first, then shade and highlight. A wash over the completed camo pattern ties the colours together and adds depth to panel lines and recesses. Highlighting is subtle — just the sharpest edges, using the lightest camo colour. Painting shading and highlighting first and then applying camo on top creates a flat, unrealistic appearance because the camo colours obscure the three-dimensional shading work.
Can you use an airbrush and a brush together for camo?
Absolutely — this is actually how many competitive painters approach camo. Use the airbrush to lay down the base colour and any soft-edged blotches (particularly for desert camo), then use a brush to add hard-edged details and smaller blotches. The combination of soft airbrush gradients and crisp brush-painted shapes creates a very realistic multi-technique result.
What’s the best camo pattern for Imperial Guard?
That depends on the regiment and campaign setting. Cadian-themed armies often use woodland green-brown patterns. Death Korps of Krieg suit urban grey camo. Tallarn Desert Raiders naturally use desert tan-brown schemes. Steel Legion work well with industrial grey and brown. Choose a pattern that matches the regiment’s lore and the terrain you envision them fighting in. There’s no single “best” pattern — the right choice depends on your narrative.
How do you keep camo looking random?
The human brain naturally seeks patterns, so deliberate randomness is harder than it sounds. Three tips: First, don’t plan individual blotch placement — just apply them where your brush naturally falls. Second, vary everything — blotch size, spacing, shape, and overlap. Third, rotate the model as you work so you’re not always painting from the same angle. If you catch yourself creating a pattern, add a few extra blotches to break it up.
Does camouflage work on Space Marines?
Lore-wise, most Space Marines don’t use camouflage — they consider it beneath their dignity as the Emperor’s finest warriors. However, some chapters (Raven Guard, Raptors, and some successor chapters) do employ tactical camouflage. Scout Marines regularly use camo. From a hobby perspective, camo Space Marines look fantastic and stand out from the usual bold colour schemes. If you want to paint camo Marines, the Raptors chapter is the most lore-appropriate choice.
Can you use Contrast paints for camouflage?
Yes. Contrast or speed paints work well for camo over a light basecoat, because they colour and shade in one coat and their soft edges suit organic patterns. Thin them a little with Contrast Medium for more control when painting blotches. Let each colour dry fully before adding the next so they don’t bleed into each other.
How do you paint digital or pixel camo on miniatures?
Paint small squares instead of blotches. With a fine brush, stack tiny square or rectangular blocks, around 1mm at 28mm scale, into irregular clusters in two or three colours over the base, lightest first. Clustering the squares into ragged shapes keeps the pattern breaking up the outline. On vehicles, tiny squares of masking tape give crisper edges.