
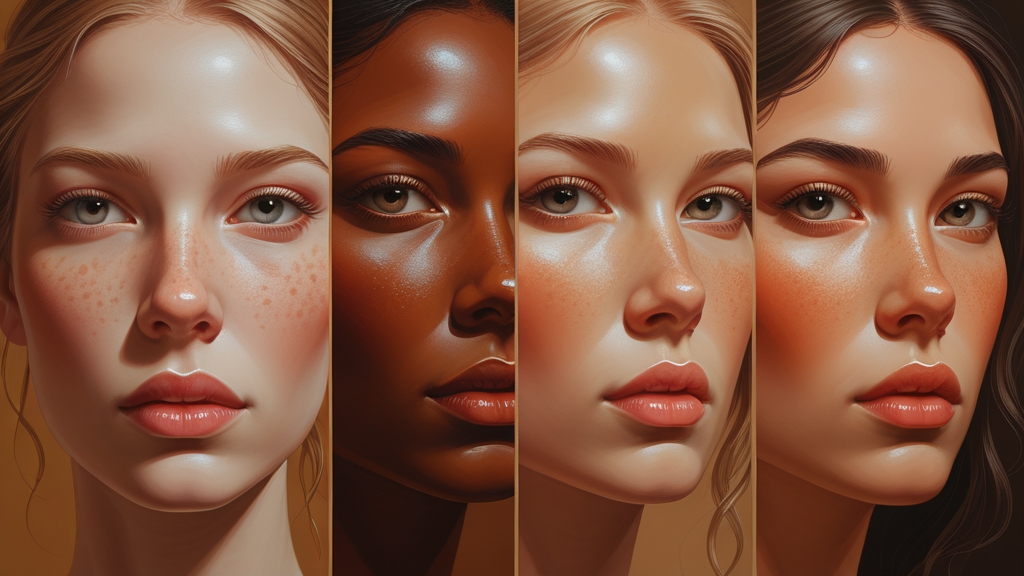
The best way to paint skin tones on miniatures is to start with a base colour matched to your desired skin tone, apply a wash for shading, then layer and highlight. For Caucasian skin use Bugman’s Glow as a base, for dark skin use Catachan Fleshtone, and for pale or undead skin use Rakarth Flesh.
Painting skin tones is one of the skills that most dramatically improves the look of your miniatures. A well-painted face draws the eye immediately and brings a model to life in a way that no amount of armour highlighting or weapon detailing can match. Unfortunately, skin is also one of the most intimidating subjects for painters because it requires smooth blending, subtle colour transitions, and an understanding of how light interacts with flesh — all skills that take practice to develop.
This guide provides complete recipes for every common skin tone in miniature painting, from light Caucasian skin to dark African skin to the inhuman tones of aliens and undead. Each recipe uses readily available paints and techniques accessible to painters of all skill levels. Whether you are painting your first model or your hundredth, these recipes will give you consistent, attractive results.
How Do You Paint Light or Caucasian Skin Tones?
The standard Caucasian skin recipe using Citadel paints is the most widely used skin tone recipe in miniature painting and produces excellent results with minimal effort:
Basecoat: Bugman’s Glow. Apply two thin coats to get an even, opaque coverage. Bugman’s Glow is a warm, ruddy brown that provides the foundation for all Caucasian skin tones. Do not worry that it looks too dark or too brown at this stage — the layering and highlighting will bring it to a natural flesh tone.
Wash: Reikland Fleshshade. Apply a single coat across the entire skin area, allowing the wash to flow into the recesses around the eyes, mouth, between fingers, and in the folds of skin. Reikland Fleshshade is specifically designed for skin tones and adds warm shadows without turning the skin grey or muddy. Let this dry completely before proceeding — rushing the wash stage is the most common cause of messy skin tones.
Layer: Cadian Fleshtone. Apply this to all the raised areas and flat surfaces, leaving the Reikland Fleshshade visible only in the deepest recesses. Cadian Fleshtone is the colour most people think of as “skin colour” in miniature painting — a warm, pinkish beige that reads as healthy Caucasian skin. Apply this in thin coats and build up gradually rather than trying to cover in a single thick coat.
Highlight: Kislev Flesh. Apply this to the most prominent points — the nose, cheekbones, brow ridge, chin, knuckles, and the tops of fingers. Kislev Flesh is a pale pink-beige that catches light and creates the impression of skin stretched over bone. Keep these highlights thin and precise — overapplying Kislev Flesh will make the skin look chalky.
Fine Highlight (optional): Pallid Wych Flesh mixed with a touch of Kislev Flesh. Apply this to the very tip of the nose, the highest point of the cheekbones, and the centre of the forehead. This final highlight adds a subtle luminosity that makes the skin look like it is reflecting light naturally.
For a warmer, more Mediterranean skin tone, substitute Bestigor Flesh for the Cadian Fleshtone layer. For a cooler, more Northern European skin tone, add a tiny amount of blue or grey to your highlight stages.
How Do You Paint Dark Skin Tones?
Dark skin tones require a different approach than simply using darker paints. Real dark skin has rich warm undertones — deep browns, reds, and sometimes purple hues — that must be captured to avoid flat, lifeless-looking results. The key is contrast: dark skin needs stronger highlights than light skin to read properly at miniature scale.
Basecoat: Catachan Fleshtone. This is a deep, warm brown with red undertones that forms the foundation for dark skin. Apply two thin coats for even coverage. Catachan Fleshtone has the warm richness that dark skin requires — avoid using cool greys or pure blacks as a base, which will produce dead-looking skin.
Wash: Agrax Earthshade. A brown wash rather than the flesh wash used for light skin, Agrax provides deeper shadows without introducing unwanted colour casts. Apply across all skin areas and let it pool in recesses. For even darker skin tones, use Nuln Oil instead, but be aware that Nuln Oil can cool the skin tone — counteract this by using warm colours in your highlights.
Layer: Bloodreaver Flesh. Apply this to raised areas and flat surfaces, leaving the wash visible in recesses. Bloodreaver Flesh is a warm brown that begins to bring the skin up to its midtone. The transition from Catachan Fleshtone through Agrax Earthshade to Bloodreaver Flesh creates a rich, warm gradient that reads as healthy dark skin.
Highlight: Knight-Questor Flesh (or Cadian Fleshtone mixed with Catachan Fleshtone). Apply to prominent features — nose, cheekbones, brow, knuckles. The highlight on dark skin should be more concentrated than on light skin, focusing on smaller areas of the most raised features. This concentrated highlighting creates the contrast that makes dark skin look vibrant and alive at tabletop distance.
Fine Highlight: Cadian Fleshtone applied very sparingly to the tip of the nose and the highest cheekbone points. This may seem too light, but at miniature scale, strong highlights on dark skin are essential for readability. The eye needs these bright points to understand the face’s structure from across a gaming table.
How Do You Paint Pale or Undead Skin?
Undead skin — whether for vampires, zombies, ghosts, or pale, sun-deprived characters — uses a cool, desaturated palette that contrasts with the warm tones of living skin. The goal is to suggest bloodlessness, decay, or supernatural pallor:
Basecoat: Rakarth Flesh. A cool, greyish beige that reads as unhealthy, bloodless skin. Rakarth Flesh is the foundation for all pale and undead skin tones. Two thin coats will give you an even, slightly eerie base that immediately reads as “not alive.”
Wash: Druchii Violet for vampires and ethereal undead (adds a bruised, supernatural quality) or Athonian Camoshade for zombies and Nurgle-touched skin (adds a sickly green undertone). The choice of wash determines the character of your undead skin — violet for aristocratic undead, green for rotting undead, blue (Drakenhof Nightshade) for frozen or ghostly undead.
Layer: Pallid Wych Flesh. Apply to raised areas, creating a stark contrast between the shadowed recesses and the pale, bloodless surfaces. Pallid Wych Flesh is almost white with a slightly warm undertone, perfect for skin that has not seen sunlight in centuries.
Highlight: White Scar mixed with a touch of Pallid Wych Flesh. Apply to nose, brow, and cheekbones. Undead skin highlights should be almost white to suggest translucence — the idea that you can almost see the bone beneath the paper-thin skin.
How Do You Paint Ork Green Skin?
Ork skin is one of the most fun skin tones to paint because the exaggerated green allows for bold techniques that would be too harsh for human skin:
Basecoat: Waaagh! Flesh. A dark, rich green that forms the base of your Ork skin. This is deliberately dark because Ork skin benefits from high contrast — the deep green shadows make the highlights pop dramatically.
Wash: Biel-Tan Green. A green wash that deepens the shadows while maintaining the green hue. Apply across all skin areas. For grittier, dirtier Orks, use Agrax Earthshade instead — this adds a muddy, unwashed quality that suits feral or barbarian Orks.
Layer: Warpstone Glow. Apply to all raised areas — muscles, knuckles, the bridge of the nose, brow ridge. Warpstone Glow is a bright, vivid green that creates the Ork’s signature look. Ork skin is muscular and taut, so emphasise the muscles on the arms, chest, and jaw with this layer.
Highlight: Skarsnik Green. Apply to the most prominent muscles and facial features. Skarsnik Green is a bright, almost yellow-green that catches light dramatically on the Ork’s exaggerated facial features and muscular physique.
Fine Highlight: Skarsnik Green mixed with Yriel Yellow. Apply to the very tips of the most prominent features — nose, knuckle peaks, top of the skull. This warm yellow-green final highlight suggests sweaty, greasy Ork skin catching the light.
How Do You Paint T’au or Grey-Blue Alien Skin?
T’au skin requires a blue-grey palette that reads as alien without looking painted or artificial:
Basecoat: The Fang. A cool grey-blue that reads as alien skin. The Fang has enough warmth to avoid looking like bare metal or stone while being clearly inhuman.
Wash: Nuln Oil thinned with Lahmian Medium (approximately 1:1). A full-strength Nuln Oil wash is too dark for T’au skin — thinning it creates subtle, graduated shadows that suggest smooth alien skin rather than weathered human skin.
Layer: Russ Grey. Apply to raised areas and flat surfaces. Russ Grey is a lighter blue-grey that brings the skin up to its midtone while maintaining the alien quality.
Highlight: Fenrisian Grey. Apply to prominent features — the nose ridge, cheekbones, and forehead. Fenrisian Grey is a pale blue that reads as the T’au’s distinctive blueish complexion.
Fine Highlight: Blue Horror. The palest blue, applied sparingly to the tip of the nose and highest points. This gives the T’au skin a slightly luminous quality that distinguishes it from simple grey.
What Are the Key Techniques for Painting Good Skin?
Regardless of which skin tone recipe you use, three techniques will dramatically improve your results:
Thin your paints. Skin requires smoother coats than any other surface on a miniature. Thick paint on skin creates visible brush strokes and texture that destroys the illusion of smooth flesh. Aim for a milk-like consistency and build up coverage with multiple thin coats rather than one thick one.
Paint the eyes first. If the face has visible eyes, paint them before applying the skin basecoat. This allows you to clean up mistakes around the eyes with the skin colour, resulting in much cleaner eye detail. Paint the entire eye socket white, add a dot of dark paint for the pupil, then clean up with your skin basecoat.
Use glazes for blending. If your layer transitions look too harsh, apply a thin glaze of the midtone colour (heavily thinned with medium) over the transition area. This softens the boundary between layers and creates the smooth gradient that makes painted skin look convincing.
Frequently Asked Questions
Can I use non-Citadel paints for these recipes?
Absolutely. Every Citadel paint has equivalents in Vallejo, Army Painter, Scale75, and other ranges. The specific brand matters less than matching the hue, saturation, and value of each step. Most paint companies publish conversion charts that let you find the closest match in their range for any Citadel colour.
How do I paint skin at speed for large armies?
For batch painting, simplify to three steps: basecoat, wash, and a single highlight. Skip the fine highlight and blending — at tabletop distance, the three-step method is nearly indistinguishable from the five-step recipe. For maximum speed, use Contrast paints — Guilliman Flesh over a white or zenithal primer produces acceptable skin tones in a single coat.
Why does my skin tone look chalky?
Chalky skin is caused by highlights that are too thick, too opaque, or too white. Thin your highlight paints more aggressively than your basecoats, and never highlight skin with pure white — always mix your lightest highlight with a touch of flesh tone to maintain warmth. If the skin already looks chalky, apply a thin glaze of your midtone colour over the affected area to knock back the chalkiness.
How do I paint Stormcast Eternals skin if their skin is pale gold?
Stormcast who show skin typically have a slightly ethereal, golden pallor that suggests their divine nature. Use the standard Caucasian recipe but substitute Kislev Flesh for the Cadian Fleshtone layer, and add a very thin glaze of Yriel Yellow to the final highlights. This gives the skin a faintly golden quality that reflects the Stormcast’s divine Reforging without looking painted or unnatural.
What is the best flesh tone paint for miniatures?
For Citadel paints, Cadian Fleshtone is the classic all-round flesh layer, usually over a Bugman’s Glow base with a Reikland Fleshshade wash and a Kislev Flesh highlight. For one-coat skin, Contrast paints such as Guilliman Flesh work well over a light primer. Other ranges have close equivalents, such as Vallejo Basic Skintone or Army Painter Barbarian Flesh.
Which Contrast paints are best for flesh tones?
Guilliman Flesh is the go-to Contrast paint for lighter skin, while Darkoath Flesh and Fyreslayer Flesh give warmer, deeper tones. Apply them over a white or Wraithbone primer for the brightest result, then add a single highlight on the nose, cheekbones and knuckles to lift the face.
What replaced Citadel Dwarf Flesh?
Cadian Fleshtone is the closest modern replacement for the old Citadel Dwarf Flesh, which was retired when the paint range was overhauled in 2012. In the same change, Bugman’s Glow replaced Tanned Flesh and Kislev Flesh replaced Elf Flesh, so older skin recipes can usually be converted directly.
How do you paint red skin on miniatures?
Base red skin with Mephiston Red, shade it with Carroburg Crimson or Agrax Earthshade, then layer Evil Sunz Scarlet and highlight with Wild Rider Red. This works well for Khorne daemons such as Bloodletters and other red-skinned characters. Keep the highlights on muscles and facial features so the skin does not look flat.