
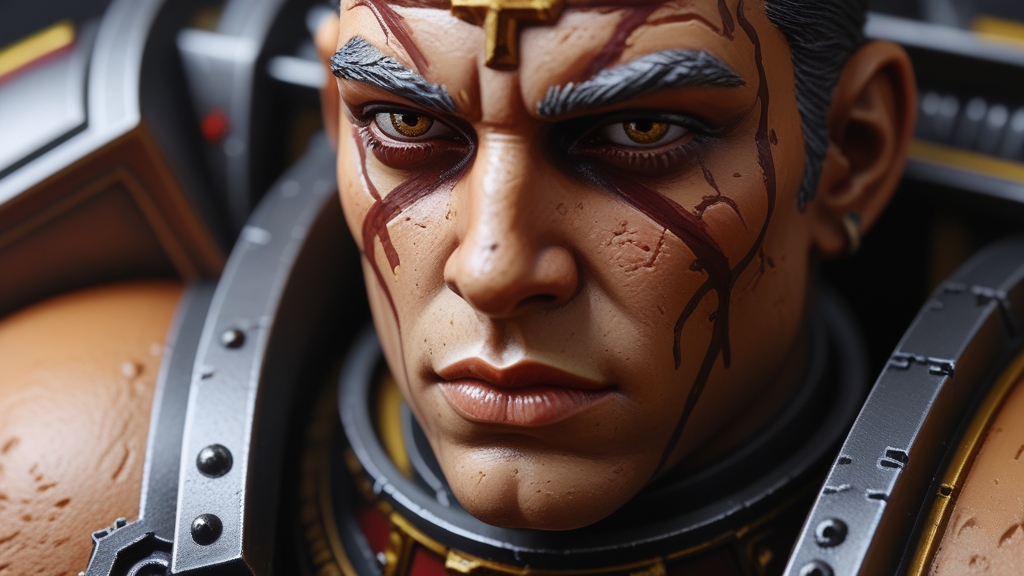
To paint faces and skin on miniatures, start with a flesh basecoat like Bugman’s Glow, wash with Reikland Fleshshade to define the recesses, then layer up with Cadian Fleshtone and highlight with Kislev Flesh. Faces are the natural focal point of any model — the viewer’s eye goes straight to them — so getting skin right has a bigger impact on your model’s appearance than almost any other technique.
Skin is one of the most rewarding things to paint well because the difference between flat, single-tone flesh and properly shaded skin is enormous. Even basic shading and highlighting transforms a miniature’s face from a featureless blob into a characterful portrait. This guide covers the full workflow for painting Caucasian, dark, and non-human skin tones, along with specific techniques for facial features like lips, stubble, and scars.
What Is the Best Skin Painting Method for Beginners?
The wash-and-layer method is the most accessible approach to painting good skin. It requires only three paints and a wash, uses no advanced techniques, and produces consistently good results on tabletop-quality miniatures.
Step 1: Basecoat
Apply a solid, even coat of your chosen flesh basecoat colour over all exposed skin areas. For Caucasian skin, Citadel Bugman’s Glow is the standard starting point — a warm, slightly ruddy brown that provides excellent coverage. Apply two thin coats rather than one thick coat to avoid obscuring facial detail.
Make sure the basecoat is completely opaque and even before proceeding. Any patchiness in the basecoat will show through the subsequent steps and is extremely difficult to fix later. Take your time here — a solid basecoat makes everything that follows easier.
Step 2: Wash / Shade
Apply Reikland Fleshshade (or equivalent warm shade) over all the skin. This single step does most of the heavy lifting — the wash flows into recesses around the nose, eye sockets, mouth, between fingers, and around muscle definition, creating natural-looking shadows. It also tones down the basecoat to a more natural skin colour.
Apply the wash liberally but controlled. You want it to pool in recesses without flooding flat areas like the forehead and cheeks. If wash pools on flat surfaces, wick it away with a clean, slightly damp brush before it dries — dried wash stains on flat areas look like dirt or bruising.
Let the wash dry completely before the next step. This takes 15-30 minutes depending on how thickly you applied it. Rushing this step by painting over wet wash is the fastest way to ruin a face.
Step 3: Layer
Reapply your basecoat colour (Bugman’s Glow) or a slightly lighter tone (Cadian Fleshtone) to the raised areas of the face: the forehead, nose bridge, cheekbones, chin, brow ridge, knuckles, and the tops of muscles on arms and legs. Leave the wash visible in the recesses. This step re-establishes the mid-tone on surfaces that catch light while preserving the shadows created by the wash.
Thin the paint slightly more than your basecoat — you want smooth, semi-transparent layers that blend gently into the washed recesses rather than creating harsh lines. Two thin layers of Cadian Fleshtone will produce a smoother result than one thick coat.
Step 4: Highlight
Apply a final highlight of Kislev Flesh (or equivalent pale flesh) to the very highest points: the tip of the nose, the top of the forehead, the upper cheekbones, the brow ridge, the chin, and the knuckles. This creates the maximum contrast that makes faces read well at tabletop distance.
Use a fine brush and apply these highlights with a light touch — you’re painting thin lines or small dots on the most prominent features. Less is more with highlights. Overdoing them makes the face look like it’s covered in white patches.
How Do You Paint Dark Skin Tones on Miniatures?
Dark skin requires a different palette but the same technique. The key difference is using warmer, richer tones and more subtle highlights — dark skin has a beautiful warmth and depth that requires careful colour selection to capture.
Dark Skin Recipe (Citadel Paints)
Basecoat: Catachan Fleshtone or Dryad Bark — a rich, warm dark brown.
Wash: Agrax Earthshade — provides warm shadows without the redness of Reikland Fleshshade.
Layer: Doombull Brown or Bloodreaver Flesh — a warm mid-tone brown with subtle red undertones.
Highlight: Skrag Brown mixed with a touch of Cadian Fleshtone — this creates a natural-looking highlight that doesn’t appear ashy or grey.
The critical mistake with dark skin is highlighting too aggressively with light colours. Adding pure white or very pale flesh to dark skin creates an ashy, unnatural appearance. Instead, highlight with warm mid-browns and reserve the lightest tones for only the very tip of the nose and the highest cheekbone point. Dark skin in real life has a rich warmth to its highlights — capturing this requires restrained, warm highlight colours.
Alternative Dark Skin Recipe (Vallejo)
Basecoat: Vallejo Chocolate Brown
Wash: Citadel Seraphim Sepia or Agrax Earthshade
Layer: Vallejo Parasite Brown
Highlight: Vallejo Bronze Fleshtone
How Do You Paint Ork Skin?
Ork skin is one of the most enjoyable things to paint in Warhammer because the green skin allows for bold, punchy colour work that’s very forgiving of minor mistakes.
Basecoat: Waaagh! Flesh — a dark, desaturated green that covers well.
Wash: Biel-Tan Green or Athonian Camoshade — both work well. Biel-Tan gives a cleaner green, Athonian gives a more muted, militaristic look.
Layer: Warpstone Glow — a vibrant mid-green that brings the skin to life.
Highlight: Skarsnik Green — a pale, slightly yellowish green for edge highlights on knuckles, nose, ears, and brow ridges.
For a more naturalistic Ork, add subtle variation by mixing small amounts of Bugman’s Glow into the green around the lips, nostrils, and inner ears. Real primates have thinner skin in these areas that shows blood vessels underneath — applying this same logic to Orks creates a more believable (if still fantastical) appearance.
How Do You Paint Tau Skin?
T’au have a distinctive blue-grey skin tone that sets them apart visually from every other faction.
Basecoat: The Fang — a cool blue-grey that captures the classic T’au look.
Wash: Drakenhof Nightshade — a blue wash that deepens the shadows while maintaining the cool tone.
Layer: Russ Grey — a lighter, slightly more saturated blue-grey.
Highlight: Fenrisian Grey — a pale, cold grey-blue for final highlights.
T’au skin should look smooth and somewhat alien. Avoid warm tones entirely — the cool palette is what sells the otherworldly appearance. The highlighting should be subtle and smooth, reflecting the T’au’s clean, technological aesthetic.
How Do You Paint Specific Facial Features?
Lips
For Caucasian skin, mix your flesh highlight colour with a tiny amount of pink or red (Pink Horror or Squig Orange works well). Apply this to the lower lip only — the upper lip is usually in shadow and doesn’t need separate treatment at 28mm scale. Keep it subtle — you want a hint of colour, not lipstick.
For dark skin, lips are slightly lighter and warmer than the surrounding skin. Use your highlight colour with a touch more warmth (add a speck of red or orange) and apply to the lower lip.
Five O’Clock Shadow / Stubble
Mix your darkest skin shade with a very small amount of dark blue-grey (Dark Reaper or The Fang). Thin this heavily and glaze it over the chin and jaw area. The blue-grey undertone creates a convincing stubble effect without painting individual hairs, which is impossible at this scale.
Apply multiple thin glazes rather than one opaque coat. You want to gradually build up the shadow until it reads as stubble from tabletop distance. Overdoing it makes the model look bruised rather than unshaven.
Scars
For healed scars, paint a thin line of your flesh highlight colour (Kislev Flesh or lighter) along the sculpted scar detail. This catches the raised edge of the scar. Then add a very thin line of pink (Cadian Fleshtone mixed with Pink Horror) alongside it for the slightly raw tissue appearance.
For fresh wounds, use red (Khorne Red) thinned heavily as a glaze over the scar area, with a highlight of bright red or pink on the raised edges.
Bald Heads
Bald heads benefit from slightly bluish undertones where the hair would be, suggesting beneath-the-skin hair follicles. Mix your flesh tone with a tiny amount of blue-grey and glaze it over the crown and sides of the head. Highlight the very top of the scalp more aggressively — bald heads catch a lot of light.
What Advanced Techniques Improve Miniature Faces?
Glazing for Smoother Blends
For competition-quality faces, replace the layering step with glazing. A glaze is extremely thin paint (barely more than tinted water) applied in many successive coats to build up colour gradually. This produces perfectly smooth transitions between shadow and highlight with no visible brush strokes or hard edges.
A basic glazing workflow for skin: apply 5-10 thin glazes of your mid-tone over the transition between shadow and highlight, gradually building opacity on the raised areas while leaving full shadow visibility in recesses. This is slower than layering but produces dramatically smoother results.
Adding Warm and Cool Variation
Real skin isn’t one uniform colour. Blood flows closer to the surface at the nose, ears, cheeks, knuckles, and elbows, creating warmer (redder/pinker) zones. Cooler (slightly blue-grey) tones appear around the jaw, temples, and anywhere hair grows beneath the skin.
To replicate this, add subtle glazes of red-pink to warm areas and blue-grey to cool areas over your finished skin. This colour variation is what separates good skin from incredible skin on display-quality miniatures.
Stippling for Skin Texture
Stippling (dabbing with the brush tip) can create subtle skin texture on larger-scale models (54mm and above). Use your highlight colour and lightly stipple over the cheeks and nose area for a slightly rough, pored skin texture. This technique is too fine for most 28mm models but works beautifully on busts and larger display pieces.
What Are Common Mistakes When Painting Miniature Faces?
Highlights too stark: The most common error. Jumping from a dark basecoat to a near-white highlight creates an unnatural, chalky appearance. Build up through mid-tones gradually.
Wash pooling on flat areas: Wash stains on the forehead and cheeks look like bruises or dirt. Always wick away pooled wash from flat surfaces before it dries.
Ignoring the sub-structure: Faces have specific anatomy — brow ridges, cheekbones, nose bridge, chin. Your highlights should follow this structure. Highlighting randomly across the face ignores the sculpted detail and looks wrong.
Same skin tone everywhere: Hands, face, arms, and torso should all have the same base skin tone but can vary slightly in shading. Faces tend to have more colour variation than arms.
Painting skin last: Always paint skin before clothing and armour. It’s much easier to tidy armour edges over finished skin than to paint skin around finished shoulder pads. Paint faces first, then work outward.
Frequently Asked Questions
What is the best Citadel skin recipe?
The classic Citadel skin recipe is Bugman’s Glow (basecoat), Reikland Fleshshade (wash), Cadian Fleshtone (layer), and Kislev Flesh (highlight). This four-paint combination is Games Workshop’s official recommendation and produces reliable, natural-looking Caucasian skin tones. It works on every model from basic troops to characters.
How do you paint faces quickly for army painting?
For speed painting, apply a flesh basecoat (Bugman’s Glow) and a single wash (Reikland Fleshshade). Skip the layering and highlighting steps. This two-step process takes under a minute per face and looks perfectly acceptable at tabletop distance. For even faster results, use Guilliman Flesh Contrast paint over a Wraithbone primer for a one-coat skin tone.
Should I paint the face before or after the body?
Paint the face first. It’s the focal point of the model, and painting it first lets you make mistakes and corrections without worrying about damaging finished work on the armour and clothing. Many painters also find it motivating to paint the face first — once the face looks good, they’re energised to finish the rest of the model.
How do I paint alien skin tones?
Use the same basecoat-wash-layer-highlight method but with non-human colours. Green for Orks (Waaagh! Flesh through Skarsnik Green), blue-grey for T’au (The Fang through Fenrisian Grey), pale grey-blue for Drukhari (Celestra Grey with Drakenhof Nightshade wash), or ashen grey for undead (Rakarth Flesh with Druchii Violet wash). The technique is identical — only the palette changes.
What paint consistency is best for painting faces?
Thin your paints to roughly the consistency of milk for basecoating and layering skin. For washes, use them straight from the pot — they’re pre-thinned. For glazes, thin to the consistency of tinted water (barely any pigment visible). A wet palette is essential for maintaining consistent paint thickness throughout a face-painting session.
How do you paint eyes on miniatures?
For tabletop models, paint the eye socket dark brown, add a tiny off-white line across each eye, then place a dark dot in the centre for the pupil. Keep the pupils level and looking the same way, because wonky eyes are very noticeable. If it goes wrong, repaint the socket with the skin shadow colour and try again; on very small faces a simple dark line often looks better.
What brush size is best for painting faces?
A size 0 or 1 detail brush with a sharp point is ideal for faces on 28-32mm miniatures. The point matters more than the size, because a good point lets you place small highlights on the nose, cheekbones and lips precisely. Use a slightly larger brush for the basecoat and wash, and save your finest brush for eyes and final highlights.
How do I fix a face that looks too orange or red?
Glaze over it with heavily thinned Cadian Fleshtone or another neutral flesh tone to knock back the colour, then re-apply your highlights. Over-applied Reikland Fleshshade is the usual cause of an orange or red cast, so wick away excess wash next time. A final light highlight of Kislev Flesh on the highest points also helps calm the face down.
Related Content
- Warhammer Painting for Beginners — Everything You Need — essential painting guide for new hobbyists
- Best Paints for Warhammer — Complete Comparison Guide — recommended paints for Warhammer miniatures
- Object Source Lighting (OSL) — Complete Miniature Painting Guide — related painting technique and tutorial
- Drybrushing Tutorial — Fast Painting for Warhammer — popular drybrushing technique tutorial