
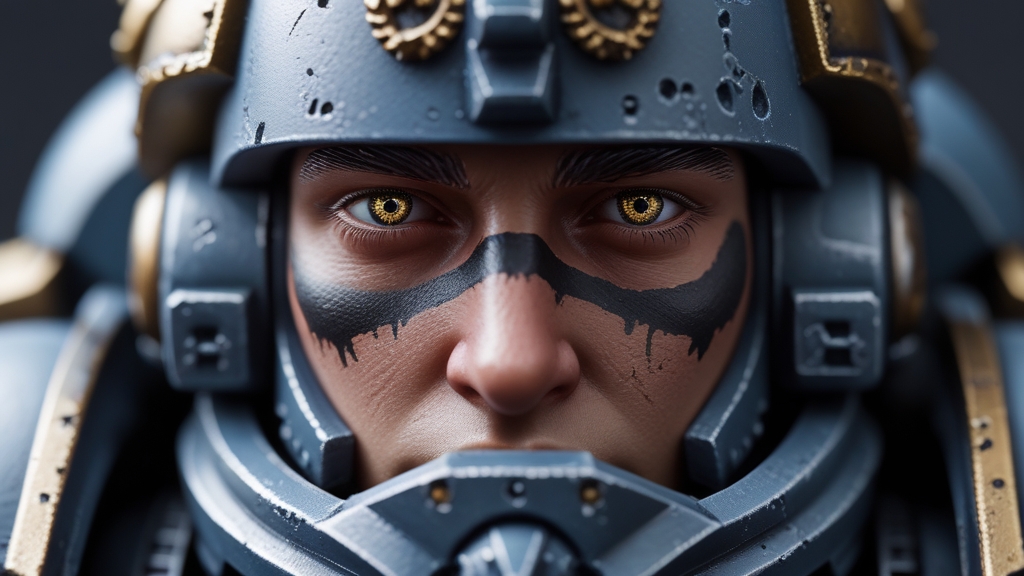
To paint eyes on miniatures, paint the entire eye socket black, add a thin horizontal line of white, then dot a tiny black pupil in the centre using the tip of a fine brush or a sharpened toothpick. This method works at any skill level, though most painters consider eyes the single hardest technique to master on 28mm miniatures. Getting eyes right transforms a face from lifeless to characterful — getting them wrong creates the dreaded “crazy eyes” that ruin an otherwise excellent paint job.
The good news is that painting eyes is a learnable skill with a predictable method. Most of the difficulty comes from hand control and brush preparation rather than artistic talent. This step-by-step guide covers the standard technique, tools that make it easier, alternatives for when eyes are too small to bother with, and how to fix the inevitable mistakes.
What Brush Do You Need for Painting Miniature Eyes?
The brush you use matters enormously. You need a brush that holds a fine point, not necessarily a tiny brush. A size 0 or size 1 Kolinsky sable brush with a sharp tip is better than a 10/0 synthetic brush that splays out. The key is the point, not the size — a larger brush with a perfect tip gives you more control than a tiny brush that can’t hold enough paint.
Recommended brushes for eyes include the Winsor & Newton Series 7 size 0, the Raphael 8404 size 0, and the Artis Opus S-series size 0. These are premium brushes that maintain their point over many painting sessions. Budget alternatives like the Army Painter Wargamer: Eyes and Lips brush are designed specifically for this task and work reasonably well, though they won’t hold their point as long.
Some painters skip brushes entirely for the pupil dot. A sharpened cocktail stick, a sewing pin, or a mechanical pencil tip can place a more precise dot than most brushes. These disposable tools eliminate the brush-control variable and let you focus purely on placement.
How Do You Paint Eyes Step by Step?
Step 1: Paint the Entire Eye Socket Black
Using a size 1 or 0 brush, paint the entire eye socket area with thinned black paint (Abaddon Black or any equivalent). Cover the area where both eyes sit. Don’t worry about neatness — you’ll clean this up later with the skin tone. The black fills the deep recess of the socket and creates the natural shadow around the eye.
Let this dry completely before proceeding. Painting over wet black will muddy your white.
Step 2: Add the White of the Eye
This is the critical step. Load a fine-pointed brush with a small amount of off-white paint (Pallid Wych Flesh or Ivory works better than pure white, which looks unnaturally stark). Wipe excess paint off the brush until the tip forms a clean point with just enough paint to make a mark.
Place the brush tip at one corner of the eye socket and draw a thin horizontal line across to the other corner. You’re aiming for a slim oval or almond shape. The line should not extend to the top or bottom of the socket — leave black visible above and below the white to create the eyelid lines.
If the white blob comes out too large (and it will, many times), let it dry and re-apply the black to reset. This back-and-forth refinement is completely normal and expected.
Step 3: Dot the Pupil
Using the tip of your finest brush or a sharpened toothpick, place a tiny dot of black in the centre of each white line. Both pupils should sit at the same position relative to the eye — usually dead centre for a forward-looking gaze.
The dot should be as small as you can physically make it. At 28mm scale, even a slightly too-large pupil makes the model look startled or deranged. If the pupil is too big, let it dry and paint over it with white, then try again.
For a natural appearance, both eyes must look in the same direction. Cross-eyed or wall-eyed miniatures are the most common eye-painting failure. If one eye looks wrong, repaint it — don’t try to match the other eye to the mistake.
Step 4: Clean Up with Skin Tone
Once the eyes are done, go around them with your flesh basecoat colour to tidy up any overspill onto the face. This clean-up step frames the eyes and makes them look natural within the face. Take your time here — neat edges around the eyes make a bigger visual difference than the eyes themselves.
Should You Paint Eyes Before or After the Face?
There are two schools of thought, and both have merit:
Eyes first (recommended for beginners): Paint the eyes immediately after priming, before any skin tones. This lets you make mistakes freely and repaint without ruining work you’ve already done on the face. You then paint the skin around the completed eyes, cleaning up as you go.
Eyes last (traditional method): Paint the entire face — basecoat, shade, layer, highlight — then add eyes at the end. This is riskier because a mistake on the eyes means repainting finished skin. However, it lets you judge exactly how the eyes look against the completed face.
Most experienced painters have settled on eyes first because the clean-up process naturally integrates the eyes into the face. The skin tone corrections around the eyes blend everything together seamlessly.
How Do You Keep Your Hand Steady for Eyes?
Hand stability is the biggest challenge. At 28mm scale, you’re placing paint dots smaller than 0.5mm, and any tremor shows immediately. These techniques help:
Brace your hands: Rest both wrists on the table edge and press the sides of your hands together. The hand holding the model and the hand holding the brush should be touching, so they move together rather than independently. Any shake in one hand is cancelled out by the same shake in the other.
Breathe out and paint: Hold your breath briefly or exhale slowly as you place the dot. Breathing causes subtle upper-body movement that transfers to your hands.
Use a painting handle: A Citadel painting handle, wine cork, or blu-tack on a pill bottle elevates the model and gives you a stable grip without cramping your fingers around a tiny base.
Take breaks: If your hands are shaking from tension or caffeine, stop and come back to it. Eyes require your steadiest moment — don’t fight through hand fatigue.
Magnification helps: A head-mounted magnifier or desk magnifier lets you see what you’re doing much more clearly. Many painters find eyes nearly impossible without magnification after age 35-40.
When Should You Skip Painting Eyes Entirely?
Not every miniature needs painted eyes. In many cases, skipping eyes produces a better-looking model than badly painted ones.
Rank and file infantry: For models that will be viewed at arm’s length on a gaming table, painted eyes are invisible. A dark wash in the eye socket creates a perfectly convincing shadow that reads as eyes from tabletop distance. Spending ten minutes per model on eyes that nobody will see is poor time management for army painting.
Helmeted models: Space Marines, Stormcast Eternals, and other helmeted models don’t have visible eyes. Paint the helmet lenses instead (covered below).
Very small scale: Models smaller than 28mm (Epic, Warmaster, 15mm historicals) are too small for painted eyes. The face is simply too tiny.
Non-human faces: Orks, Tyranids, Necrons, and many other Warhammer factions have alien features where the standard eye technique doesn’t apply. Red or glowing eye effects (described below) often work better than white-and-black human eyes.
How Do You Paint Glowing Eyes on Miniatures?
Glowing eyes are easier than realistic eyes and look fantastic on Space Marines, Necrons, Eldar, and daemonic models. The technique creates the illusion of light emanating from the eye sockets.
Step 1: Paint the entire eye socket with the glow colour (e.g., Moot Green for Necrons, Evil Sunz Scarlet for angry Marines).
Step 2: Add a lighter version of the colour to the centre of each eye (Flash Gitz Yellow over Moot Green, or Wild Rider Red over Evil Sunz Scarlet).
Step 3: For a stronger glow effect, paint a thin line of the glow colour on the skin immediately around the eye socket, representing light spilling onto the face. This “object source lighting” (OSL) sells the glowing effect convincingly.
Glowing eyes have a major advantage: they’re forgiving of imprecision. A slightly messy glow effect looks like light bleed, whereas a slightly messy realistic eye looks like a medical condition.
How Do You Paint Helmet Lenses?
Space Marine and Stormcast helmet lenses use a technique called gem painting to create the illusion of a curved, transparent lens.
Step 1: Basecoat the lens with a dark version of your chosen colour (Khorne Red for red lenses, Caliban Green for green).
Step 2: Paint the bottom half of the lens with a lighter shade (Evil Sunz Scarlet or Warpstone Glow).
Step 3: Add a small bright highlight to the bottom corner (Wild Rider Red or Moot Green).
Step 4: Place a tiny white dot in the upper corner of the lens, opposite the bright highlight. This represents the light reflection and instantly makes the lens look glossy and curved.
For extra effect, apply a coat of gloss varnish (Ardcoat) over the finished lens to make it physically shiny.
What Are the Most Common Mistakes When Painting Eyes?
White too bright: Pure white eyes look startled and unnatural. Use off-white (Pallid Wych Flesh, Ivory, or white mixed with a drop of flesh tone) for a more realistic appearance.
Pupils too large: The most common error. Large pupils make models look permanently surprised. Make the pupil as small as physically possible — it’s almost always better to err on the side of too small.
Cross-eyed or wall-eyed: Pupils pointing in different directions. Always repaint rather than trying to live with misaligned pupils. The fix is to repaint one eye entirely (black, white, dot) rather than adjusting the existing pupil.
Whites too thick: Overly large white areas make the model look like it’s staring in horror. The whites should be thin slits, not round circles.
Not cleaning up: Skipping the skin-tone clean-up step around the eyes leaves rough edges that make the eyes look painted-on rather than natural.
Frequently Asked Questions
What is the easiest way to paint eyes on miniatures?
The easiest method is to paint the eye socket dark brown or black and leave it. A dark recess reads as a shadowed eye from gaming distance without any risk of creating crazy eyes. If you do want to paint detailed eyes, use the socket-black, white-line, black-dot method described above with the tip of a toothpick for the pupil — it’s more forgiving than a brush.
Do you need a special brush for miniature eyes?
You need a brush with a sharp point, but it doesn’t need to be an expensive specialist brush. A size 0 round brush in good condition works well. What matters most is that the tip converges to a clean point without stray bristles. A sharpened toothpick or cocktail stick is an effective alternative for placing pupils.
How do you fix a badly painted eye?
Paint over the entire eye with black paint to reset to Step 1, then redo the white and pupil. This is faster and more effective than trying to fix an existing eye. Accept that eyes often take 3-5 attempts per model — even experienced painters rarely get them right on the first try.
Should I paint eyes on every miniature?
No. Paint eyes on characters, heroes, and display models where the face is a focal point and will be viewed closely. Skip eyes on rank-and-file troops, small-scale models, and any model that will primarily be seen at arm’s length on a gaming table. A dark wash in the eye socket is sufficient for tabletop standard.
How do you paint eyes with glasses or goggles?
Paint the goggle or spectacle lens as a solid colour (dark grey, blue-grey, or orange for a tinted effect) and add a small white highlight dot to suggest glass reflection. This is much easier than painting eyes and looks great on models with visors or eyewear.
How do you paint an iris on a miniature eye?
Once the white is in place, add a small dot of colour (blue, green or brown) in the centre, then a smaller black dot inside it for the pupil. This only reads on larger or display models. At standard 28mm tabletop scale, a single black dot looks cleaner and is far easier to get right.
Can you use a fine-tip pen to paint miniature eyes?
Yes. Some painters use an archival fine-liner (around 0.05mm) to place pupils, because a pen gives a consistent dot without having to control paint on a brush. Seal the model with varnish afterwards, since some inks can smudge or react to washes applied on top.
Related Content
- Warhammer Painting for Beginners — Everything You Need — essential painting guide for new hobbyists
- Best Paints for Warhammer — Complete Comparison Guide — recommended paints for Warhammer miniatures
- Object Source Lighting (OSL) — Complete Miniature Painting Guide — related painting technique and tutorial
- Drybrushing Tutorial — Fast Painting for Warhammer — popular drybrushing technique tutorial