

Use 3x1mm neodymium magnets for infantry weapon swaps, 5x1mm for vehicle and dreadnought weapons, and 3x2mm for heavier joints. N52 strength is ideal for miniatures — it provides a firm hold without being so strong that you can’t pull parts apart for swapping.
Magnetizing miniatures lets you swap weapons, arms, heads, and vehicle turrets between games without buying duplicate models. One Space Marine Captain can carry every loadout option in the kit. One Leman Russ can switch between battle cannon, demolisher cannon, and punisher gatling. It saves money, saves shelf space, and future-proofs your army against rules changes.
This guide covers our top magnet picks, the right magnet sizes for every model type, where to buy them, N52 vs N35 grade differences, polarity marking, and the drilling process. For the full magnetizing technique, see our guide to magnetizing Warhammer models.
Our Top Picks at a Glance
Our picks are based on manufacturer specs, the Amazon listings and what painters commonly use – we explain the reasoning for each below.
| Product | Size / grade | Price | ||
|---|---|---|---|---|
 | The Army Painter Miniature and Model Magnets (100 pcs) Best Overall | 80 x 3x1mm + 20 x 5x1mm, N52 | $15.39 as of Nov 13, 2026 6:40 PM PST | Buy on Amazon |
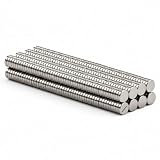 | Boom N52 Neodymium Disc Magnets 3x1mm (100 pack) Best Infantry Refill | 100 x 3x1mm, N52 | $19.49 as of Nov 13, 2026 6:40 PM PST | Buy on Amazon |
 | Boom N52 Neodymium Disc Magnets 5x2mm (100 pack) Best for Vehicles | 100 x 5x2mm, N52 | $21.49 as of Nov 13, 2026 6:40 PM PST | Buy on Amazon |
 | Green Stuff World Neodymium Magnets 3x2mm (100 pcs) Best for Terminators & Heavy Weapons | 100 x 3x2mm, N52 | $25.30 as of Nov 13, 2026 6:40 PM PST | Buy on Amazon |
 | MEALOS Mini Magnets Combo Pack (200 pcs) Best Budget | 3x1mm, 4x2mm, 5x2mm mix | $7.99 as of Nov 13, 2026 6:40 PM PST | Buy on Amazon |
 | The Army Painter Miniature and Model Drill Best Drill for Magnetising | Pin vice + 3 bits | $16.35 as of Nov 13, 2026 6:40 PM PST | Buy on Amazon |
 | Green Stuff World Self-Adhesive Magnetic Sheet (A4) Best for Movement Trays | A4 sheet, 0.9mm, self-adhesive | $14.52 as of Nov 13, 2026 6:40 PM PST | Buy on Amazon |
Prices are from Amazon.com (US) at the time shown. Product prices and availability are accurate as of the date/time indicated and are subject to change. Any price and availability information displayed on Amazon.com at the time of purchase will apply to the purchase of this product. As an Amazon Associate, Warhammer Guild earns from qualifying purchases.
The Best Magnets for Miniatures (2026)
1. The Army Painter Miniature and Model Magnets (100 pcs) – Best Overall

Price details
Product prices and availability are accurate as of the date/time indicated and are subject to change. Any price and availability information displayed on Amazon.com at the time of purchase will apply to the purchase of this product.As an Amazon Associate, Warhammer Guild earns from qualifying purchases.
Army Painter’s magnet pack contains exactly the two sizes most Warhammer magnetising needs: 3x1mm for infantry arms and backpacks, and 5x1mm for dreadnought and vehicle weapons. They are N52 grade and sold directly by Army Painter, so you know what you are getting.
Best for: Anyone starting to magnetise infantry and dreadnoughts.
| Contents | 80 x 3x1mm and 20 x 5x1mm |
|---|---|
| Grade | N52 neodymium |
| Thickness | 1mm |
| Pairs with | Army Painter 3mm drill bit, Model Drill and Super Glue |
Why we like it
- The two most-used hobby sizes in one pack
- N52 grade, the strongest common neodymium grade
- Army Painter says its 3mm drill bit fits these magnets exactly
- Simple instructions included – drill 1mm deep, glue, check polarity
- Ideal first magnet purchase
- Trusted hobby brand with known sizes
- Enough for several characters and a vehicle
- Only 20 of the larger 5mm magnets
- No 2mm-thick magnets for heavy parts
2. Boom N52 Neodymium Disc Magnets 3x1mm (100 pack) – Best Infantry Refill

Price details
Product prices and availability are accurate as of the date/time indicated and are subject to change. Any price and availability information displayed on Amazon.com at the time of purchase will apply to the purchase of this product.As an Amazon Associate, Warhammer Guild earns from qualifying purchases.
Once you have run out of 3x1mm magnets – and you will – a 100-pack of the standard infantry size is the obvious refill. Boom lists the grade, pull force and plating clearly, and says the magnets drop into a 3mm pin-vice hole and sit flush.
Best for: Magnetising whole squads of infantry.
| Size | 3mm x 1mm |
|---|---|
| Quantity | 100 |
| Grade | N52 |
| Pull force | Up to 0.3 lb (per Boom) |
| Coating | Ni-Cu-Ni nickel |
| Magnetisation | Axial, through the flat face |
Why we like it
- 3x1mm is the standard infantry swap size
- N52 grade with a stated pull force of up to 0.3 lb
- Triple-layer nickel plating for corrosion resistance
- Axially magnetised, which keeps polarity marking simple
- Clear, specific specifications
- Fits a 3mm drill bit flush
- 100 magnets covers a lot of arms
- Only one size in the pack
- Tiny magnets – tweezers recommended
3. Boom N52 Neodymium Disc Magnets 5x2mm (100 pack) – Best for Vehicles

Price details
Product prices and availability are accurate as of the date/time indicated and are subject to change. Any price and availability information displayed on Amazon.com at the time of purchase will apply to the purchase of this product.As an Amazon Associate, Warhammer Guild earns from qualifying purchases.
Heavier weapons need more hold, and a 5x2mm magnet has much more pull than the 1mm-thick infantry size. Boom quotes up to 1.3 lb of pull force – plenty for sponsons, turret weapons and dreadnought arms.
Best for: Vehicle sponsons, turrets, dreadnought and Knight weapons.
| Size | 5mm x 2mm |
|---|---|
| Quantity | 100 |
| Grade | N52 |
| Pull force | Up to 1.3 lb (per Boom) |
| Coating | Ni-Cu-Ni nickel |
Why we like it
- Extra thickness gives a much stronger hold for heavy parts
- N52 grade with a stated pull force
- Boom mentions Warhammer arms and transport trays as intended uses
- 100 pieces is enough for a whole vehicle park
- Strong hold for vehicles and big resin parts
- Consistent sizes for drilled sockets
- Nickel plated
- Needs 2mm of depth – too thick for slim infantry parts
- Strong enough to snap together hard; watch your fingers
4. Green Stuff World Neodymium Magnets 3x2mm (100 pcs) – Best for Terminators & Heavy Weapons

Price details
Product prices and availability are accurate as of the date/time indicated and are subject to change. Any price and availability information displayed on Amazon.com at the time of purchase will apply to the purchase of this product.As an Amazon Associate, Warhammer Guild earns from qualifying purchases.
When a 5mm magnet won’t fit but a 3x1mm isn’t strong enough, the 3x2mm size is the answer. Green Stuff World is a hobby supplier that sells magnets packaged for miniatures, and this pack is N52 grade.
Best for: Terminators, Primaris heavy weapons and other weighty infantry parts.
| Size | 3mm x 2mm |
|---|---|
| Quantity | 100 |
| Grade | N52 |
| Brand | Green Stuff World (hobby-specific) |
Why we like it
- Same 3mm hole as standard infantry magnets, but thicker for more hold
- N52 grade from a well-known hobby brand
- Good for Terminator weapons and Primaris heavy weapons
- Pairs well with 3x1mm magnets on the other side of a join
- Stronger hold without a wider hole
- Hobby-focused supplier
- 100 in the pack
- Needs a 2mm-deep socket
- Usually sold by third-party sellers on Amazon
5. MEALOS Mini Magnets Combo Pack (200 pcs) – Best Budget

Price details
Product prices and availability are accurate as of the date/time indicated and are subject to change. Any price and availability information displayed on Amazon.com at the time of purchase will apply to the purchase of this product.As an Amazon Associate, Warhammer Guild earns from qualifying purchases.
If you want to try magnetising without spending much, this combo pack gives you three useful sizes plus a storage case. The included rod magnet is handy for picking up tiny magnets and keeping polarity consistent.
Best for: Trying magnetising cheaply, or 3D-printed bits.
| Contents | 100 x 3x1mm, 50 x 4x2mm, 50 x 5x2mm |
|---|---|
| Tolerance | ±0.03mm diameter, ±0.05mm thickness (per MEALOS) |
| Extras | Storage case and a rod magnet for placing |
| Grade | Not stated |
Why we like it
- Three sizes covering infantry and vehicle swaps
- Stated tight size tolerances
- Storage case keeps sizes separate
- Rod magnet helps place magnets and check polarity
- Very low cost for 200 magnets
- Good size variety
- Handy storage
- Magnet grade is not stated on the listing
- Not hobby-specific branding – check strength before committing a big project
6. The Army Painter Miniature and Model Drill – Best Drill for Magnetising
Price details
Product prices and availability are accurate as of the date/time indicated and are subject to change. Any price and availability information displayed on Amazon.com at the time of purchase will apply to the purchase of this product.As an Amazon Associate, Warhammer Guild earns from qualifying purchases.
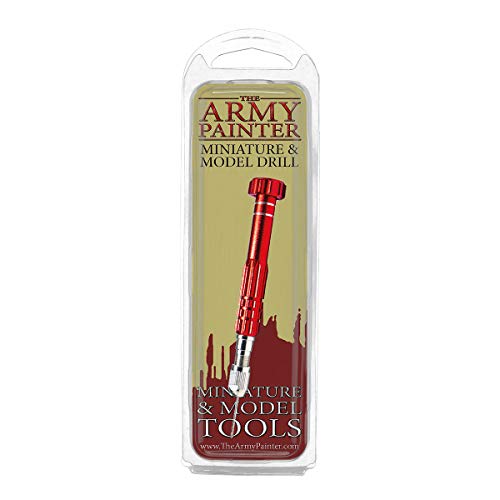
You can’t magnetise without drilling, and a pin vice gives far more control than a power tool on small plastic parts. Army Painter’s Model Drill comes with three bits, and its separate 10-piece bit set includes a 3mm bit that Army Painter says fits its 3mm magnets.
Best for: Drilling clean, controlled magnet holes.
| Type | Manual pin vice (hand drill) |
|---|---|
| Includes | Drill and 3 bits |
| For | Plastic, resin and metal miniatures |
| Extra bits | Army Painter 10-bit pack, 0.7–3mm (sold separately) |
Why we like it
- Hand drill gives slow, controlled cuts that won’t melt or crack plastic
- Made for miniatures in plastic, resin and metal
- Matching drill-bit pack adds the 3mm size for magnets
- Doubles as your pinning tool
- Precise and beginner-friendly
- Small and comfortable for fine work
- Part of a matched hobby system
- Magnet-size bits need the separate bit pack
- Slower than a powered rotary tool on big holes
7. Green Stuff World Self-Adhesive Magnetic Sheet (A4) – Best for Movement Trays

Price details
Product prices and availability are accurate as of the date/time indicated and are subject to change. Any price and availability information displayed on Amazon.com at the time of purchase will apply to the purchase of this product.As an Amazon Associate, Warhammer Guild earns from qualifying purchases.
Magnetic sheet is the quick way to hold whole units on movement trays or keep models from sliding about in a case. Green Stuff World’s A4 sheet is self-adhesive and cuts easily to size.
Best for: Movement trays and lining transport cases.
| Size | A4 (200 x 300mm per GSW) |
|---|---|
| Thickness | 0.9mm |
| Backing | Self-adhesive |
| Coverage | Up to three 50-model trays on 20mm bases (per GSW) |
Why we like it
- Self-adhesive – cut, peel and stick
- Works alone or with steel sheet and neodymium magnets for stronger hold
- Green Stuff World says one sheet covers several movement trays
- Great for The Old World and other rank-and-file regiment games
- Fast way to magnetise whole units
- Easy to cut
- Pairs with magnets under bases
- Weaker hold than neodymium on its own
- Not for weapon swaps
What Size Magnets Do You Need for Miniatures?
The right magnet size depends on the weight of the parts being held and the available space in the model. Here’s a comprehensive size chart covering every common scenario.
Magnet Size Chart by Model Type
Infantry weapon swaps (arms, hands, backpacks):
- 3x1mm — The standard infantry magnet. Fits inside Space Marine, Stormcast, and most infantry arm sockets. Strong enough to hold a plastic arm with weapon securely. This single size covers 80% of infantry magnetizing.
- 2x1mm — For smaller infantry (Guardsmen, Eldar, Skaven) where 3mm is too wide for the joint. Also useful for head swaps on infantry.
Vehicle and dreadnought weapons:
- 5x1mm — Standard for dreadnought arms, Terminator weapons, and small vehicle weapon mounts. The larger diameter provides more hold strength for heavier resin and metal parts.
- 5x2mm — For vehicle turret weapons (Leman Russ sponsons, Predator lascannons) and Knight weapon arms. The extra thickness doubles the magnetic force.
Large models and heavy joins:
- 6x2mm — For Imperial Knight weapon arms, vehicle turret rotation, and large model sub-assemblies. Provides very strong hold for heavy parts.
- 3x2mm — Alternative to 3x1mm when you need extra holding force but 5mm is too wide. Good for Terminators and Primaris Marines with heavy weapons.
- 8x2mm or 10x2mm — For extremely heavy parts: Titan weapon mounts, large resin kits, or models that need to support significant cantilevered weight.
Specialty uses:
- 1x1mm — For tiny parts: individual fingers on power fists, very small head options, or detail parts.
- 6x1mm or 8x1mm flat disc — For model-to-base attachment (magnetizing models to metal movement trays or transport cases).
- 3x3mm cube — For flight stand connections. The square shape prevents rotation.
What Is the Difference Between N52 and N35 Magnets?
The N-rating (N35, N42, N48, N52) measures the maximum energy product of the magnet — essentially its strength. Higher numbers mean stronger magnets. N52 is the strongest commercially available neodymium grade.
N52: The ideal grade for miniatures. A 3x1mm N52 magnet holds a plastic Space Marine arm with no risk of it falling off during gaming. The extra strength means you can use smaller magnets while still getting a secure hold, which matters when drilling into small model parts. N52 costs slightly more but is worthwhile.
N35: The weakest common grade. A 3x1mm N35 magnet holds a plastic arm but with noticeably less force — parts may droop or detach if bumped. N35 works for lightweight parts but you may need to go up a size (e.g., 5x1mm instead of 3x1mm) to get equivalent holding strength. The cost saving over N52 is minimal for the quantities hobbyists use.
N42 and N48: Middle-ground options. Both work well for miniatures. N42 is commonly found in bulk packs and provides good performance for most applications. If N52 isn’t available or is significantly more expensive, N42 is a fine alternative.
Recommendation: Buy N52 whenever possible. The price difference for hobby quantities (50-200 magnets) is usually small, and the stronger hold makes assembly easier and results more reliable. You’ll never regret having magnets that are too strong — you’ll definitely regret magnets that are too weak when arms fall off mid-game.
How to Choose Magnets for Miniatures
Buy the sizes you will actually use. 3x1mm covers most infantry swaps and 5x1mm or 5x2mm covers dreadnoughts and vehicles, which is why a mixed starter pack like Army Painter’s is the easiest first buy. Add 3x2mm for heavier infantry weapons and 6x2mm or larger for Knights and big resin kits.
Check the grade and the dimensions. Cheap listings often skip the grade or advertise N52 and ship something weaker. Look for a stated grade (N52 ideally), exact diameter and thickness, and nickel (Ni-Cu-Ni) plating to resist corrosion – then check reviews that mention dimensional accuracy.
Specialist suppliers. In the UK, First4Magnets is the long-standing community favourite for consistent sizes; in the US, K&J Magnetics sells small quantities with detailed specs. Green Stuff World and Magnet Baron package magnets specifically for miniatures. AliExpress is cheapest for bulk orders of 500+ but delivery is slow and quality varies.
Buy more than you think. A single vehicle can use 10-20 magnets and a full army 50-100+. Larger packs are much cheaper per magnet, and spares get used fast once you start magnetising.
How Do You Mark and Manage Magnet Polarity?
Polarity is the single biggest source of magnetizing mistakes. Every magnet has a north and south pole. Two magnets attract when opposite poles face each other and repel when same poles face each other. If you install one magnet with the wrong polarity, the parts push apart instead of sticking together. Here’s how to avoid this.
Mark one pole on every magnet before installation. Use a marker pen to dot one face of each magnet in your bag. All dots face the same direction (let’s say “into the body part”). When you install a magnet in the body, the dot goes face-down into the hole. When you install the matching magnet in the arm, the dot goes face-up (so the unmarked faces meet each other). Consistent marking prevents polarity errors.
Test before gluing. Before applying any super glue, stack the magnet onto the installed one to confirm they attract. If they repel, flip it. Only glue once you’ve confirmed attraction. This 3-second test saves 30 minutes of drilling out a wrong-polarity magnet.
Use a “master” magnet. Keep one marked magnet as your reference. Every time you install a new magnet, test it against the master first. If it attracts with the marked face up, install it marked-face down into the hole. This standardises polarity across your entire army — all body sockets use the same polarity, so any arm fits any body.
Fixing wrong polarity: If you’ve glued a magnet with the wrong polarity, use super glue debonder to dissolve the bond, or carefully drill alongside the magnet with a fresh drill bit to break it free. Stack a second magnet on top (with correct polarity) as a last resort — but this raises the magnet above the surface and may create a visible bump.
How Do You Drill Holes for Magnets?
Drilling is the most important physical step. A well-drilled hole ensures the magnet sits flush with the surface and holds securely. For a complete step-by-step, including how to combine pinning with magnets, see our guide to pinning miniatures.
Use a pin vice (a hand drill such as the Army Painter Miniature and Model Drill above) with a drill bit matching your magnet diameter. For 3mm magnets, use a 3mm bit. For 5mm magnets, use a 5mm bit. Some hobbyists drill slightly undersized (2.8mm for a 3mm magnet) for a friction fit, but this risks cracking thin plastic.
Drill depth: Match the magnet thickness exactly. For a 1mm thick magnet, drill 1mm deep. For a 2mm magnet, drill 2mm deep. Mark the drill bit with tape to ensure consistent depth. The magnet should sit flush with or very slightly below the model’s surface. A magnet protruding above the surface creates a visible gap between parts.
Start with a pilot hole. Use a smaller bit (1mm) or a sharp needle to create a starting point, then drill to full size. This prevents the larger bit from wandering across the surface.
Glue the magnet: Apply a small drop of super glue into the hole, then press the magnet in with the correct polarity (marked face as per your system). Push it fully flush with the surface. Wipe away excess glue immediately. Let it cure for 5 minutes before testing.
Frequently Asked Questions
Can you magnetize plastic and resin models?
Yes, both work equally well. Plastic is easier to drill (softer material, less risk of cracking). Resin requires more care — drill slowly and use gentle pressure, as resin can crack if forced. Metal models can also be magnetized, though drilling metal is harder and you’ll dull drill bits faster. For metal models, consider combining magnets with pinning for maximum strength.
How many magnets do you need for a Space Marine army?
For a typical Space Marine army with magnetized characters and key weapon options: approximately 50-80 magnets in 3x1mm and 5x1mm sizes. Characters need 4-8 magnets each (arms + backpack). Dreadnoughts need 4-6. Vehicles need 8-16 (turret + sponsons + hull weapon). Buy a pack of 100 3x1mm and 50 5x1mm to cover a full army with spares.
Do magnets affect miniature painting?
Not at all. Install magnets during assembly (before priming), and primer and paint cover the surrounding plastic normally. The magnet face itself should be left unpainted for maximum magnetic strength — paint between the magnet faces slightly reduces the hold. If you prime over the magnet, sand or scrape the paint off the magnet face before final assembly.
Can you use magnets for transport cases?
Yes — this is one of the best uses for magnets. Glue a thin magnet (6x1mm or 8x1mm) under each model’s base. Line your transport case with steel sheet or magnetic sheet (see our best army transport case guide). The models stick firmly to the case surface and won’t shift during transport. This is lighter, thinner, and more secure than foam padding. Many tournament players use this method exclusively.
What if the magnet is too strong and damages the model?
N52 magnets in the sizes used for miniatures (3-6mm) are strong but not strong enough to damage plastic or resin models. The concern is more about ease of removal — if a joint is too tight to pull apart easily, use a slightly smaller magnet or add a thin layer of paint over one magnet face to reduce grip. In practice, this is rarely an issue at miniature scales.
Should I magnetise before or after painting?
Fit the magnets before painting, ideally during assembly while you can still reach the sockets and test-fit parts. Painting afterwards hides any glue marks and stops drilling from chipping finished paint. Paint the magnetised parts separately, but keep the paint thin on the faces that touch so the joint stays snug.
Do neodymium magnets lose strength over time?
Not in any way you’ll notice. Neodymium magnets keep almost all their strength for decades. The main risks are heat, since high temperatures can weaken them permanently, and rust if the nickel plating chips. Keep them away from very hot surfaces and handle them gently, as they’re brittle and can crack if they snap together hard.
What glue should I use to fix magnets in place?
Use super glue (cyanoacrylate). Plastic cement only bonds plastic to plastic, so it won’t hold a metal magnet. Put a small drop in the drilled hole, press the magnet in with a pin or the tip of a hobby knife after checking polarity, and wipe away any glue that squeezes out. Green stuff can fill gaps around oversized holes.
Related Content
- How to Start a Warhammer Collection — Ultimate Beginner Guide — guide to starting your Warhammer collection
- Best Warhammer Board Games — Ranked & Reviewed — related product review
- How to Play Warhammer 40k — Complete Beginner’s Guide — beginner guide to Warhammer 40K
- Best 3D Printer for Miniatures — Resin Printer Guide — related content on a similar topic